Sending Email in C# using FluentEmail
Sending transactional emails in C# is a common need in many enterprise software solutions. However, as Tim Corey explains in his video, "Sending Email in C# using FluentEmail," this process doesn’t have to be difficult. Whether you want to send simple text messages, HTML emails, or handle bulk emails, FluentEmail offers an easy way to implement email sending functionality using modern methods and smtp protocols.
In this article, we'll walk through the process following Tim Corey’s video, to fully learn how to send emails in C# using FluentEmail, set up an SMTP server, build dynamic HTML email messages, and effectively test the entire email sending process.
Introduction to FluentEmail
Tim starts by explaining the background: sending emails in C# used to rely on older tools like System.Net.Mail, but with .NET 5 and later versions, much of that has been deprecated. That's where FluentEmail, a modern email library, comes in to fill the gap for both simple messages and more sophisticated communications like HTML emails and inline images.
Tim points out that the goal is to easily create emails, use templates, and even test them without connecting to production servers.
Setting Up the Console Application
At 1:04, Tim creates a new Console Application named EmailDemoApp. He highlights the simplicity of starting with static void Main(string[] args) or simply public static void Main when you don't need a UI. The clean starting point allows for focusing solely on the email sending process.
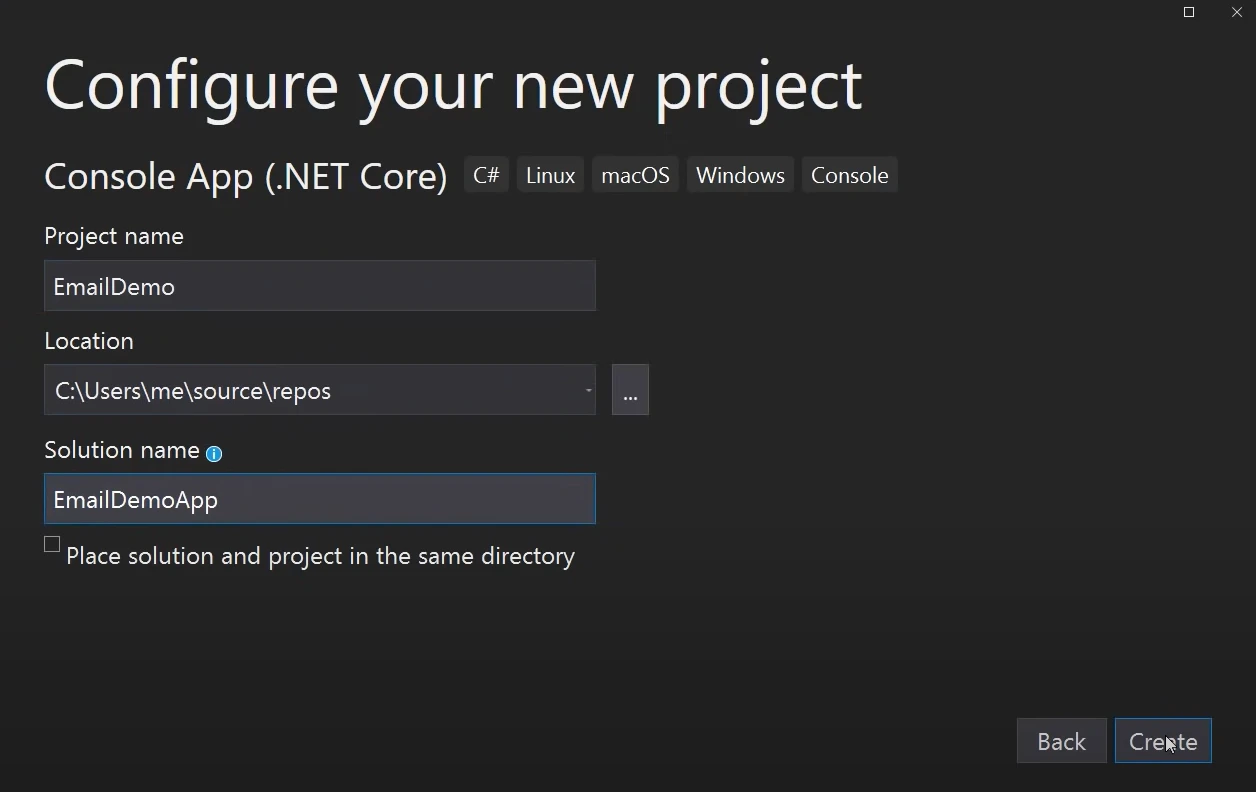
After creating the app, Tim sets the project to target .NET 5, a modern upgrade from the traditional .NET Framework, ensuring better compatibility with modern protocols for email clients.
Installing FluentEmail via Package Manager Console
Next, at 3:50, Tim uses the Package Manager Console to install package FluentEmail.Smtp, enabling the use of an smtp client to send emails in C#. Alongside it, Tim mentions there are additional integrations like MailGun and SendGrid, but SMTP is the most universal option, working across most email clients and setups.

Using the following command, you could install it manually:
Install-Package FluentEmail.SmtpInstall-Package FluentEmail.SmtpTim ensures we add the FluentEmail.Core dependency too, which is necessary for the library to work.
Configuring the SMTP Client and Server
By 6:10, Tim discusses setting up the smtp client using a new smtpclient configuration:
var sender = new SmtpSender(() => new SmtpClient("localhost")
{
    EnableSsl = false,
    DeliveryMethod = SmtpDeliveryMethod.SpecifiedPickupDirectory,
    PickupDirectoryLocation = @"C:\Demos"
});
var sender = new SmtpSender(() => new SmtpClient("localhost")
{
EnableSsl = false,
DeliveryMethod = SmtpDeliveryMethod.SpecifiedPickupDirectory,
PickupDirectoryLocation = @"C:\Demos"
});Tim stresses that this smtp server http://localhost is for local testing. In production, you would connect to your real smtp server details such as Gmail’s SMTP endpoint, possibly using an app password for security.
He highlights that sensitive settings should be moved into a config file like appsettings.json for better security and flexibility.
Sending a Simple Email Message
At 11:59, Tim moves on to sending a simple message using FluentEmail’s email API. He explains that a var email object is created with the following code example:
var email = await Email
    .From("tim@timco.com")
    .To("test@test.com", "Sue")
    .Subject("Thanks")
    .Body("Thanks for buying our product.")
    .SendAsync();
var email = await Email
.From("tim@timco.com")
.To("test@test.com", "Sue")
.Subject("Thanks")
.Body("Thanks for buying our product.")
.SendAsync();This way, you specify the string subject, string email, and message body clearly using method chaining. The var message (email) holds the result, allowing for error checking.
Tim points out that while the email appears to be from tim@timco.com, the smtp server will still authenticate it based on the login credentials (like a Gmail app password).
Viewing the Email Using Local Directory
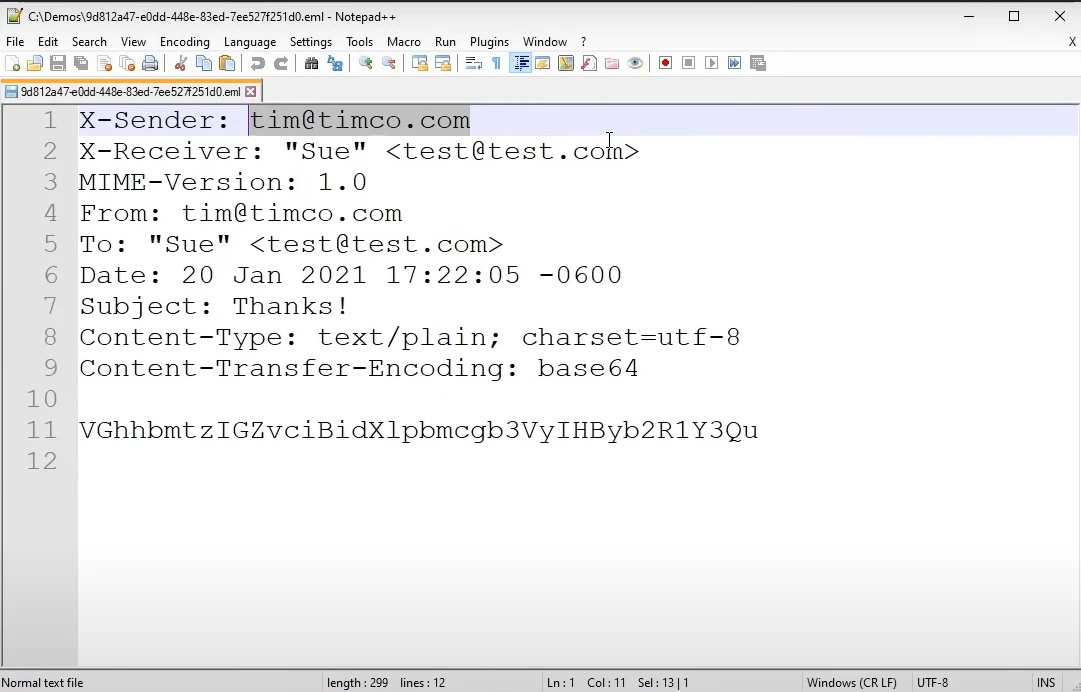
Once the email message is sent, Tim shows how it appears as a .eml file in the local folder. Although you can open it with Outlook or Notepad, for existing email messages or bulk testing, it’s not the most user-friendly.
Using Papercut SMTP for Easier Testing
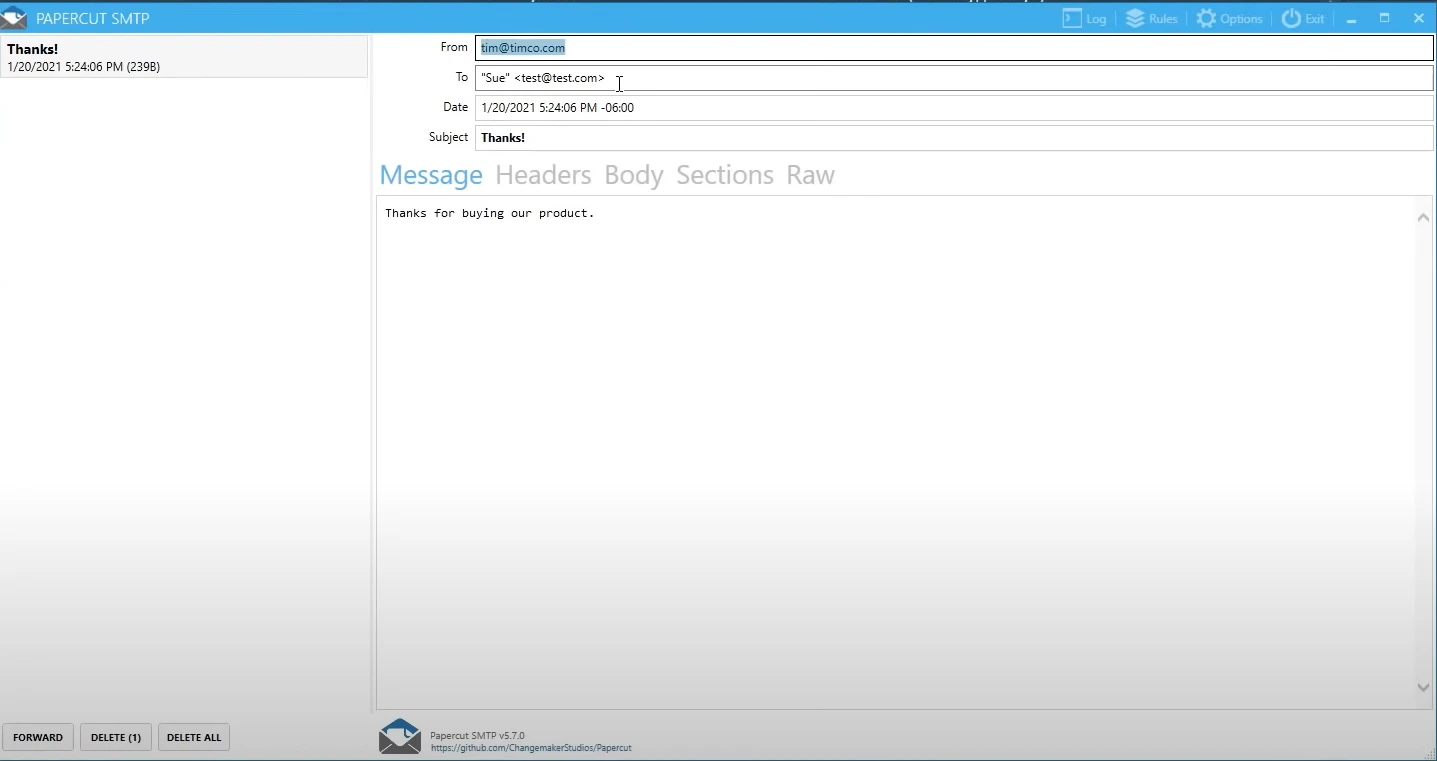
At 17:03, Tim switches from saving to a directory to using Papercut SMTP, a lightweight fake SMTP server.
He modifies the smtp client settings to:
DeliveryMethod = SmtpDeliveryMethod.Network;
Port = 25;
DeliveryMethod = SmtpDeliveryMethod.Network;
Port = 25;With Papercut, every test email shows up immediately in a GUI. This makes checking plain text and HTML body content much easier and simulates how real email clients render different formats.
Building an HTML Email with Razor Templates
At 19:12, Tim notes that static plain text isn’t enough for many real-world cases. For more dynamic, rich HTML messages, he installs the FluentEmail.Razor package:
Install-Package FluentEmail.RazorInstall-Package FluentEmail.RazorHe updates the project settings with:
<PreserveCompilationContext>true</PreserveCompilationContext><PreserveCompilationContext>true</PreserveCompilationContext>to ensure Razor templates compile properly.
Creating and Using a Razor Email Template
Using a string builder (var builder) and Razor syntax, Tim creates a dynamic email template:
var builder = new StringBuilder();
builder.AppendLine("Dear @Model.FirstName,");
builder.AppendLine("<p>Thanks for purchasing @Model.ProductName.</p>");
builder.AppendLine("The TimCo Team");
var builder = new StringBuilder();
builder.AppendLine("Dear @Model.FirstName,");
builder.AppendLine("<p>Thanks for purchasing @Model.ProductName.</p>");
builder.AppendLine("The TimCo Team");He then attaches this template to the var request using the following code:
await Email
    .UsingTemplate(builder.ToString(), new { FirstName = "Tim", ProductName = "Bacon Wrapped Bacon" })
    .SendAsync();
await Email
.UsingTemplate(builder.ToString(), new { FirstName = "Tim", ProductName = "Bacon Wrapped Bacon" })
.SendAsync();This technique supports different formats like plain text and html body, depending on the template content.
Handling Multiple Recipients and Attachments
Although not fully detailed in Tim’s demo, FluentEmail easily supports multiple recipients via .To() calls and adding an attachment object for file attachments, similar to how the mailmessage object or mailmessage class in older .NET worked.
You can create attachments using a new string file path or content id for inline images.
Exception Handling in the Email Sending Process
Tim hints that you should handle errors gracefully. For instance:
try
{
    var result = await Email.SendAsync();
}
catch (Exception ex)
{
    Console.WriteLine(ex.Message);
}
try
{
var result = await Email.SendAsync();
}
catch (Exception ex)
{
Console.WriteLine(ex.Message);
}This captures any SMTP or network-related failures during the email sending process, particularly if smtp protocol issues arise.
Summary and Final Thoughts
At around 27:56, Tim concludes that with FluentEmail, sending emails in C# becomes straightforward — from sending hello world-style simple messages to professional, dynamic html emails.
He also stresses the importance of keeping your smtp server details and configurations flexible using a config file like appsettings.json, especially when moving between local development and cloud platforms like Azure Portal.
Whether you’re aiming to send mails individually or in bulk emails, FluentEmail combined with Papercut SMTP offers a modern, efficient workflow compatible with many programming languages and ecosystems.
Final Thoughts
Thanks to Tim Corey’s excellent video, it’s clear that modern email sending functionality in C# has evolved beyond basic smtpclient class and mailmessage class handling. With the help of FluentEmail, developers can quickly create a new project, configure an SMTP connection, build a dynamic email body, and test everything locally before deploying to production.