C# Top Design Patterns
Design patterns are reusable solutions to common software development problems, providing templates to structure and implement object-oriented code in a more efficient and maintainable way. They help developers solve problems with object creation, structure, and communication in a flexible and scalable manner. Design patterns serve as best practice concepts that guide developers in writing better code. One of the foundational principles in software design is the Single Responsibility Principle (SRP), which is part of the SOLID principles.
In his video, "Design Patterns: Single Responsibility Principle Explained Practically in C# (The S in SOLID)," Tim Corey explores the Single Responsibility Principle (SRP), highlighting its significance in software design and providing practical insights on how to implement it effectively. This article offers a concise overview of the key takeaways from his video, emphasizing the importance of SRP in creating clean, maintainable code.
Introduction to SRP
In software design, SOLID principles are crucial for creating maintainable and scalable code. They ensure that code is easy to understand, test, and modify. The five principles—Single Responsibility Principle (SRP), Open/Closed Principle (OCP), Liskov Substitution Principle (LSP), Interface Segregation Principle (ISP), and Dependency Inversion Principle (DIP)—are integral to object-oriented design and can be applied within design patterns to make solutions more robust.
By applying design patterns in C#, developers can solve common problems more effectively. Whether it's creating objects, defining tree structures, or ensuring reusability with single instances, design patterns provide predefined solutions that enhance software architecture. Patterns like the Factory Method, Builder, and Singleton provide flexible, reusable solutions, while behavioral and structural patterns help manage complexity and improve communication within systems. By learning and utilizing these patterns, developers can build systems that are easier to maintain and extend.
Tim discusses the concept of SRP, emphasizing that it is crucial for developers to ensure their code adheres to best practices. SRP states that a class should have only one responsibility or reason to change. This principle helps maintain clean, maintainable, and scalable code.
Demo Code Overview
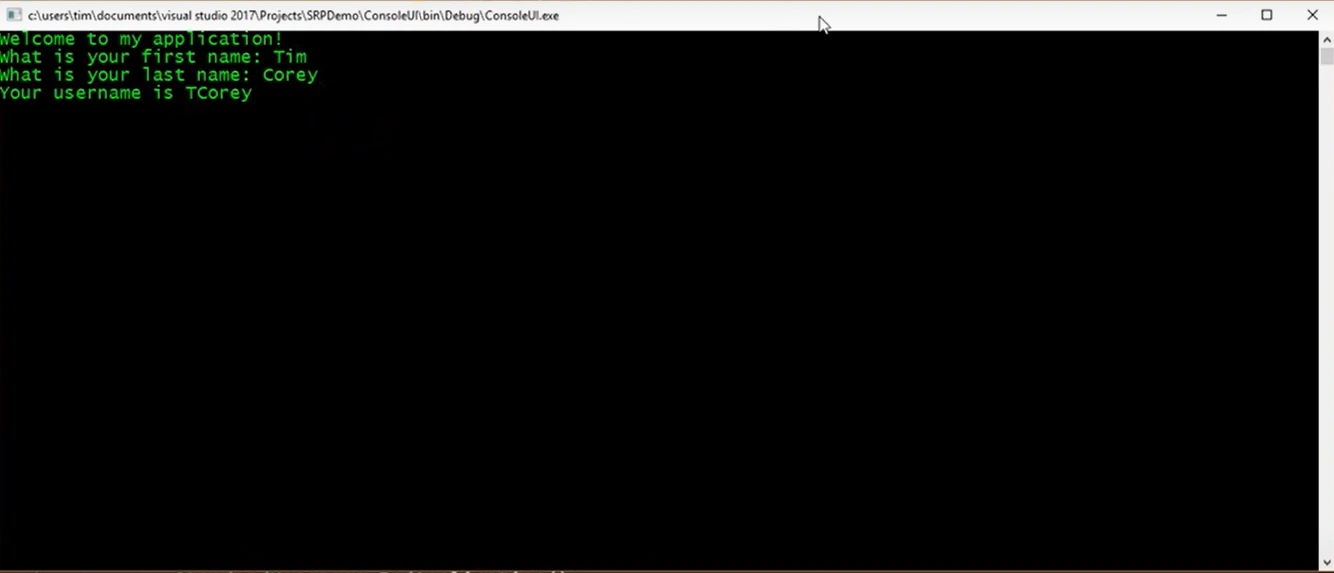
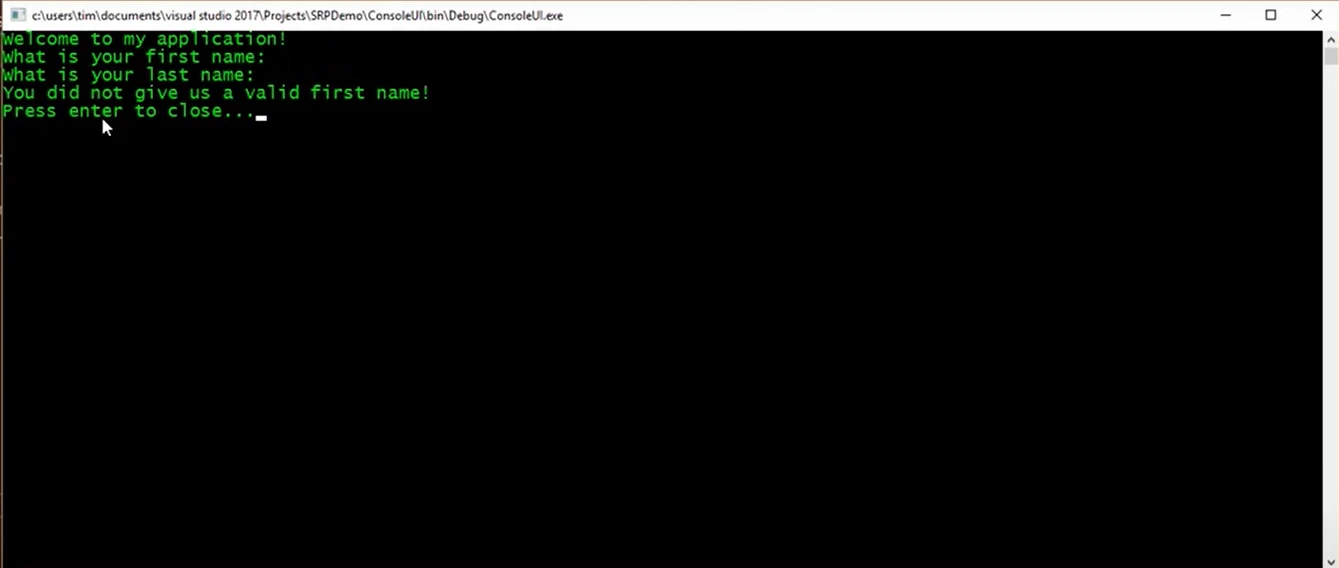
Tim sets up a simple console application in C# that asks for the user's first and last name, validates these names, and then generates a username. The initial implementation violates SRP, providing an excellent opportunity to demonstrate how to refactor code to adhere to this principle.
SRP Explained
Tim explains SRP by highlighting the multiple responsibilities within the initial class:
- User Interaction: Handling welcome messages and prompts.
- Data Capture: Capturing the user's first and last name.
- Validation: Validating the input names.
- Username Generation: Generating a username from the input names.
Each of these responsibilities represents a different reason for the class to change, violating SRP.
Refactoring to Adhere to SRP
Tim demonstrates how to refactor the code to follow SRP by extracting each responsibility into its own class. This approach ensures that each class has a single reason to change, making the code more modular and easier to maintain.
Practical Example
Tim provides a practical example of refactoring:
using System;

class Program
{
    static void Main(string[] args)
    {
        Console.WriteLine("Welcome to my application");

        Console.Write("Enter your first name: ");
        string firstName = Console.ReadLine();

        Console.Write("Enter your last name: ");
        string lastName = Console.ReadLine();

        if (string.IsNullOrWhiteSpace(firstName) || string.IsNullOrWhiteSpace(lastName))
        {
            Console.WriteLine("You did not give us valid information!");
            Console.ReadLine();
            return;
        }

        var userName = $"{firstName.Substring(0, 1)}{lastName}".ToLower();
        Console.WriteLine($"Your username is {userName}");

        Console.WriteLine("Press enter to close...");
        Console.ReadLine();
    }
}
using System;
class Program
{
static void Main(string[] args)
{
Console.WriteLine("Welcome to my application");
Console.Write("Enter your first name: ");
string firstName = Console.ReadLine();
Console.Write("Enter your last name: ");
string lastName = Console.ReadLine();
if (string.IsNullOrWhiteSpace(firstName) || string.IsNullOrWhiteSpace(lastName))
{
Console.WriteLine("You did not give us valid information!");
Console.ReadLine();
return;
}
var userName = $"{firstName.Substring(0, 1)}{lastName}".ToLower();
Console.WriteLine($"Your username is {userName}");
Console.WriteLine("Press enter to close...");
Console.ReadLine();
}
}Refactoring Step-by-Step
Step 1: Creating the StandardMessages Class
First, Tim creates a class to handle standard messages shown to the user. This class will manage welcome messages and end messages.
public class StandardMessages
{
    public static void WelcomeMessage()
    {
        Console.WriteLine("Welcome to my application");
    }

    public static void EndApplication()
    {
        Console.WriteLine("Press enter to close...");
        Console.ReadLine();
    }

    public static void ShowValidationErrorMessage()
    {
        Console.WriteLine("You did not give us valid information!");
    }
}
public class StandardMessages
{
public static void WelcomeMessage()
{
Console.WriteLine("Welcome to my application");
}
public static void EndApplication()
{
Console.WriteLine("Press enter to close...");
Console.ReadLine();
}
public static void ShowValidationErrorMessage()
{
Console.WriteLine("You did not give us valid information!");
}
}In the Program class, replace the direct calls to Console.WriteLine and Console.ReadLine with calls to the methods in the StandardMessages class:
class Program
{
    static void Main(string[] args)
    {
        StandardMessages.WelcomeMessage();

        // Other code...

        StandardMessages.EndApplication();
    }
}
class Program
{
static void Main(string[] args)
{
StandardMessages.WelcomeMessage();
// Other code...
StandardMessages.EndApplication();
}
}Step 2: Creating the PersonDataCapture Class
Next, Tim creates a class to handle capturing the person's first and last name. This class will be responsible for collecting user input and returning a Person object.
public class PersonDataCapture
{
    public static Person Capture()
    {
        Person output = new Person();

        Console.Write("Enter your first name: ");
        output.FirstName = Console.ReadLine();

        Console.Write("Enter your last name: ");
        output.LastName = Console.ReadLine();

        return output;
    }
}
public class PersonDataCapture
{
public static Person Capture()
{
Person output = new Person();
Console.Write("Enter your first name: ");
output.FirstName = Console.ReadLine();
Console.Write("Enter your last name: ");
output.LastName = Console.ReadLine();
return output;
}
}Step 3: Creating the Person Class
You also need a Person class to hold the first and last name of the user.
public class Person
{
    public string FirstName { get; set; }
    public string LastName { get; set; }
}
public class Person
{
public string FirstName { get; set; }
public string LastName { get; set; }
}In the Program class, replace the direct user input handling with a call to PersonDataCapture.Capture:
class Program
{
    static void Main(string[] args)
    {
        StandardMessages.WelcomeMessage();

        Person user = PersonDataCapture.Capture();

        // Other code...

        StandardMessages.EndApplication();
    }
}
class Program
{
static void Main(string[] args)
{
StandardMessages.WelcomeMessage();
Person user = PersonDataCapture.Capture();
// Other code...
StandardMessages.EndApplication();
}
}Step 4: Creating the PersonValidator Class
Next, Tim creates a class to handle validation of the person's first and last name. This class will be responsible for ensuring the names are not null or whitespace.
public class PersonValidator
{
    public static bool Validate(Person person)
    {
        if (string.IsNullOrWhiteSpace(person.FirstName))
        {
            StandardMessages.ShowValidationErrorMessage("first name");
            return false;
        }

        if (string.IsNullOrWhiteSpace(person.LastName))
        {
            StandardMessages.ShowValidationErrorMessage("last name");
            return false;
        }

        return true;
    }
}
public class PersonValidator
{
public static bool Validate(Person person)
{
if (string.IsNullOrWhiteSpace(person.FirstName))
{
StandardMessages.ShowValidationErrorMessage("first name");
return false;
}
if (string.IsNullOrWhiteSpace(person.LastName))
{
StandardMessages.ShowValidationErrorMessage("last name");
return false;
}
return true;
}
}In the Program class, replace the validation code with a call to PersonValidator.Validate:
class Program
{
    static void Main(string[] args)
    {
        StandardMessages.WelcomeMessage();

        Person user = PersonDataCapture.Capture();

        if (!PersonValidator.Validate(user))
        {
            StandardMessages.EndApplication();
            return;
        }

        // Other code...

        StandardMessages.EndApplication();
    }
}
class Program
{
static void Main(string[] args)
{
StandardMessages.WelcomeMessage();
Person user = PersonDataCapture.Capture();
if (!PersonValidator.Validate(user))
{
StandardMessages.EndApplication();
return;
}
// Other code...
StandardMessages.EndApplication();
}
}Step 7: Creating the AccountGenerator Class
Tim moves the username generation and account creation logic into a new AccountGenerator class.
Creating the AccountGenerator Class:
- The class includes the logic to generate the username and simulate account creation.
public class AccountGenerator
{
public static void CreateAccount(Person user)
{
    string username = $"{user.FirstName.Substring(0, 1)}{user.LastName}".ToLower();
    Console.WriteLine($"Your username is: {username}");
}
}
public class AccountGenerator { public static void CreateAccount(Person user) { string username = $"{user.FirstName.Substring(0, 1)}{user.LastName}".ToLower(); Console.WriteLine($"Your username is: {username}"); } }Updating the Main Class:
- Call the AccountGenerator to create the account in the main class.
class Program
{
    static void Main(string[] args)
    {
        StandardMessages.WelcomeMessage();

        Person user = PersonDataCapture.Capture();

        bool isUserValid = PersonValidator.Validate(user);
        if (!isUserValid)
        {
            StandardMessages.EndApplication();
            return;
        }

        AccountGenerator.CreateAccount(user);

        StandardMessages.EndApplication();
    }
}
class Program
{
static void Main(string[] args)
{
StandardMessages.WelcomeMessage();
Person user = PersonDataCapture.Capture();
bool isUserValid = PersonValidator.Validate(user);
if (!isUserValid)
{
    StandardMessages.EndApplication();
    return;
}
AccountGenerator.CreateAccount(user);
StandardMessages.EndApplication();
}
}
Summary and Conclusions
In this concluding section, Tim Corey summarizes the benefits and implementation of the Single Responsibility Principle (SRP) through the refactoring process of the demo code. He highlights the advantages of breaking the application into smaller, focused classes.
Key Benefits of SRP
Simplified Code Maintenance:
Each class has a single responsibility, making it easier to locate where changes need to be made. For example, user data capture logic is clearly placed under PersonDataCapture.
- This structure simplifies understanding, as anyone looking to modify user validation knows to check PersonValidator.
Improved Readability:
- With clearly defined responsibilities, the main program flow becomes more readable. The code now reads like a set of clear, sequential actions:
StandardMessages.WelcomeMessage(); Person user = PersonDataCapture.Capture(); bool isUserValid = PersonValidator.Validate(user); if (!isUserValid) { StandardMessages.EndApplication(); return; } AccountGenerator.CreateAccount(user); StandardMessages.EndApplication();StandardMessages.WelcomeMessage(); Person user = PersonDataCapture.Capture(); bool isUserValid = PersonValidator.Validate(user); if (!isUserValid) { StandardMessages.EndApplication(); return; } AccountGenerator.CreateAccount(user); StandardMessages.EndApplication();Reduced Complexity:
Small classes with focused responsibilities tend to have fewer lines of code, making them easier to understand and maintain.
- Example: The StandardMessages class methods are concise and serve single purposes, such as displaying a welcome message or ending the application.
public class StandardMessages
{
public static void WelcomeMessage()
{
    Console.WriteLine("Welcome to my application");
}

public static void EndApplication()
{
    Console.WriteLine("Press enter to close...");
    Console.ReadLine();
}

public static void ShowValidationErrorMessage(string fieldName)
{
    Console.WriteLine($"You did not give us a valid {fieldName}!");
}
}
public class StandardMessages { public static void WelcomeMessage() { Console.WriteLine("Welcome to my application"); } public static void EndApplication() { Console.WriteLine("Press enter to close..."); Console.ReadLine(); } public static void ShowValidationErrorMessage(string fieldName) { Console.WriteLine($"You did not give us a valid {fieldName}!"); } }
Ease of Code Changes:
Since each class has a single reason to change, modifying the code in response to new requirements becomes straightforward.
- Example: If the requirement is to change the ending message, the change occurs solely in the StandardMessages.EndApplication method.
Better Debugging and Collaboration:
With smaller, well-defined classes, debugging becomes simpler as you can easily pinpoint the location of an issue.
- New developers can onboard more quickly, understanding the clear structure and responsibilities of each class.
Addressing Concerns on Many Classes
Tim addresses a common concern that applying SRP results in too many classes, making the project cumbersome:
Navigation and Understanding:
Tools like IntelliSense in Visual Studio make navigating multiple classes straightforward. For example, pressing F12 navigates directly to the definition of methods or classes.
- Having many small, manageable pieces can make understanding the entire application easier compared to large monolithic classes.
Performance and Storage:
- The additional classes do not significantly impact disk space or performance, considering modern storage and computing capabilities.
Balance and Excess:
Tim advises finding a balance. If a class's responsibility causes it to grow too large, consider if it has multiple reasons to change, indicating it may need further division.
- He suggests that if you need to scroll through a class extensively in Visual Studio, it may be too large and require splitting.
Practical Implementation
Tim encourages developers to apply SRP gradually, especially in existing codebases. Start with small changes and new code to align with SRP principles. This incremental approach ensures smoother transitions and continual improvement.
Conclusion
Tim Corey’s refactoring example demonstrates how adhering to the Single Responsibility Principle (SRP) results in cleaner, more maintainable code. By breaking down responsibilities into smaller, focused classes, developers can improve readability, debugging, and collaboration within their codebases. This foundational principle of the SOLID design patterns paves the way for more advanced principles and best practices in software development.
For more detailed information and code samples, please watch his video and visit his channel for more design patterns videos.


