Format Code Programmatically with DotNet Format
In this article, we’ll walk through the process of formatting your C# .NET code programmatically using the dotnet format tool. This guide is based on Gerald Versluis's video tutorial on "Format Your C# .NET Code Automatically with DotNet Format", where he demonstrates how to use the tool effectively to ensure your code adheres to consistent formatting standards. I'll provide timestamps and detailed explanations of what Gerald did in the video to help you follow along and apply these techniques to your projects.
Introduction to DotNet Format
At (0:36), Gerald introduces dotnet format as a tool designed to format C# code based on the rules defined in an .editorconfig file. This file is pivotal in enforcing consistent coding styles throughout your project. It ensures that all code adheres to the same formatting guidelines, which can include:
- Indentation Style: Whether to use tabs or spaces.
- Spacing Rules: The amount of space around operators, braces, etc.
- Code Structure: How single-line and multi-line constructs are formatted.
By applying these rules, dotnet format helps maintain a uniform codebase, making it easier to read and manage.
Understanding the .editorconfig File
The .editorconfig file, as explained by Gerald at (0:48), specifies various coding style preferences. This file is highly flexible and allows you to define a wide range of formatting rules, including:
- Indentation Preferences: Determines whether tabs or spaces are used for indentation and how many spaces are used.
- Spacing Guidelines: Controls spacing around code elements like operators, braces, and keywords.
- Other Formatting Rules: Defines additional style rules to ensure code consistency.
The .editorconfig file serves as a central point of configuration for code formatting across different editors and IDEs.
Overview of the DotNet Format Tool
Gerald explains that dotnet format is a global tool for the .NET runtime at (1:13). Being a global tool means it can be installed once and used across various .NET projects on your system. This allows for consistent code formatting without the need for separate installations or configurations for each project.
You can access the dotnet format repository on GitHub at (1:26). This repository provides the source code, documentation, and additional information about the tool, helping users understand its functionalities and stay updated with the latest versions.
Basic Usage of DotNet Format
At (2:09), Gerald demonstrates the basic command for using dotnet format:
dotnet format <options> <workspace>dotnet format <options> <workspace>What is a Workspace?
In the context of dotnet format, the term "workspace" refers to the scope of code that will be formatted. This can include:
- A Solution File: The .sln file that encompasses multiple projects.
- A Project File: An individual .csproj file containing specific code files.
- A Folder: A directory that contains multiple code files, including .cs and potentially .vb files.
The flexibility to specify different types of workspaces allows you to apply formatting across various levels of your project.
Features and Options
Gerald highlights several key features and options of dotnet format at (2:27):
- Automatic Fixing: The tool can automatically correct formatting issues based on the rules defined in your .editorconfig file. This is useful for maintaining consistent code style across your project without manual intervention.
- Check Only: If you prefer to review formatting issues without making changes, you can use the tool to check for issues only. This feature is particularly useful in continuous integration (CI) pipelines.
Advanced Options and Customization
Gerald explores advanced options and customization. He mentions:
- Severity Level: Allows you to specify which severity levels of issues should be fixed. This helps in targeting specific types of formatting problems.
- Including/Excluding Files: You can control which files are included or excluded from formatting. This is useful for focusing on particular parts of your codebase.
- Check Only with Exit Code: By using the check option, you can verify if there are any formatting issues without applying fixes. The exit code will indicate whether issues were found.
- JSON Report: Generates a detailed report in JSON format, providing insights into the formatting status of your code.
- Verbosity: Set the Verbosity level to control the amount of output generated.
- Tool Version: Check the version of dotnet format to ensure compatibility with your project and to stay updated with new features.
Installation of Dotnet Format Tool
Gerald starts by explaining the installation process for the dotnet format tool, which is essential for programmatically formatting C# code. He shows how to set it up as a global tool with the following command:
dotnet tool install -g dotnet-formatdotnet tool install -g dotnet-formatThis command ensures that dotnet format is available globally, allowing easy access from any command prompt or terminal. Gerald emphasizes the need for the .NET Core runtime, which should be installed if you've been working with .NET recently.
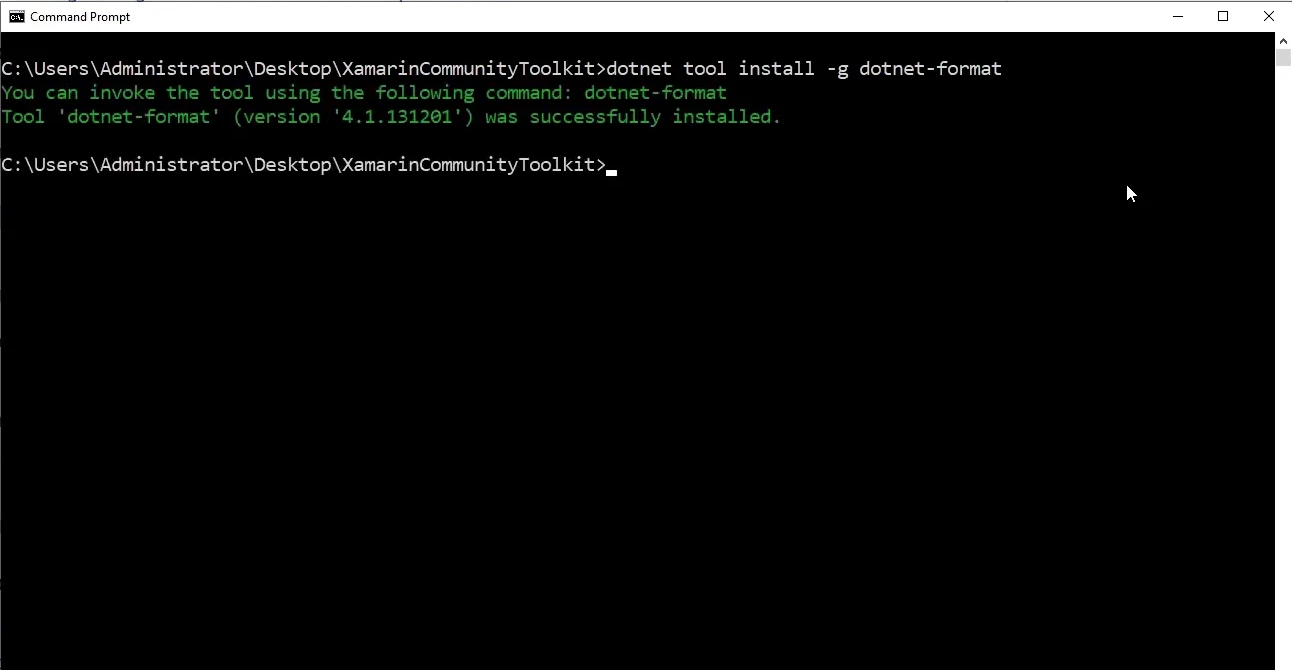
To confirm that the installation was successful, at (4:00), Gerald runs:
dotnet format /?dotnet format /?This command displays the list of available options and commands, verifying that dotnet format is correctly installed and ready for use.
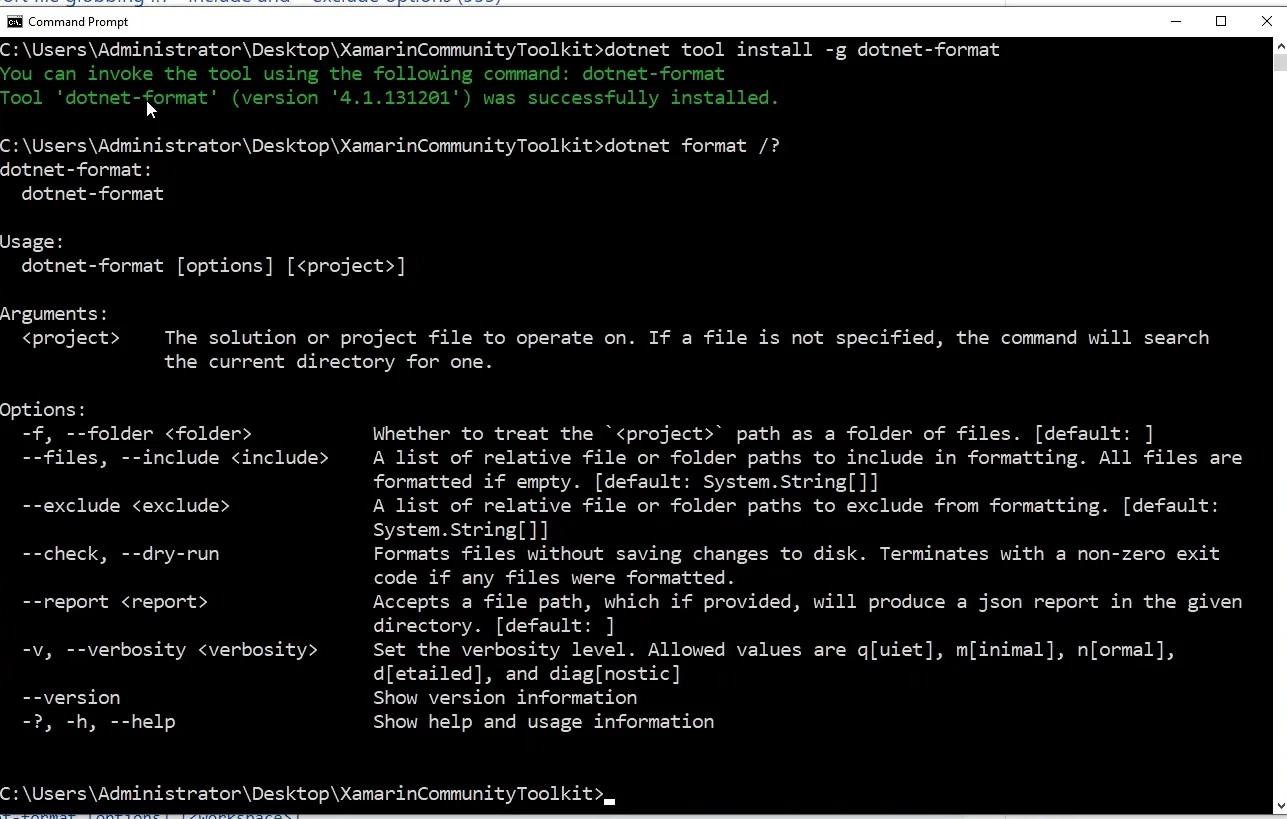
At (4:11), Gerald notes that some options, such as --dry-run, are deprecated and advises using updated practices for code formatting.
Applying Code Formatting Fixes
Checking Formatting Issues
Using the Xamarin Community Toolkit codebase as a practical example, Gerald first checks for formatting issues without applying any changes. He runs:
dotnet format . -f --checkdotnet format . -f --checkto identify files that need formatting. Gerald at (5:26) explains how you can specify the workspace using --folder for directories or dotnet format sln for solution files. This command lists files with formatting issues.
Error Level Checking
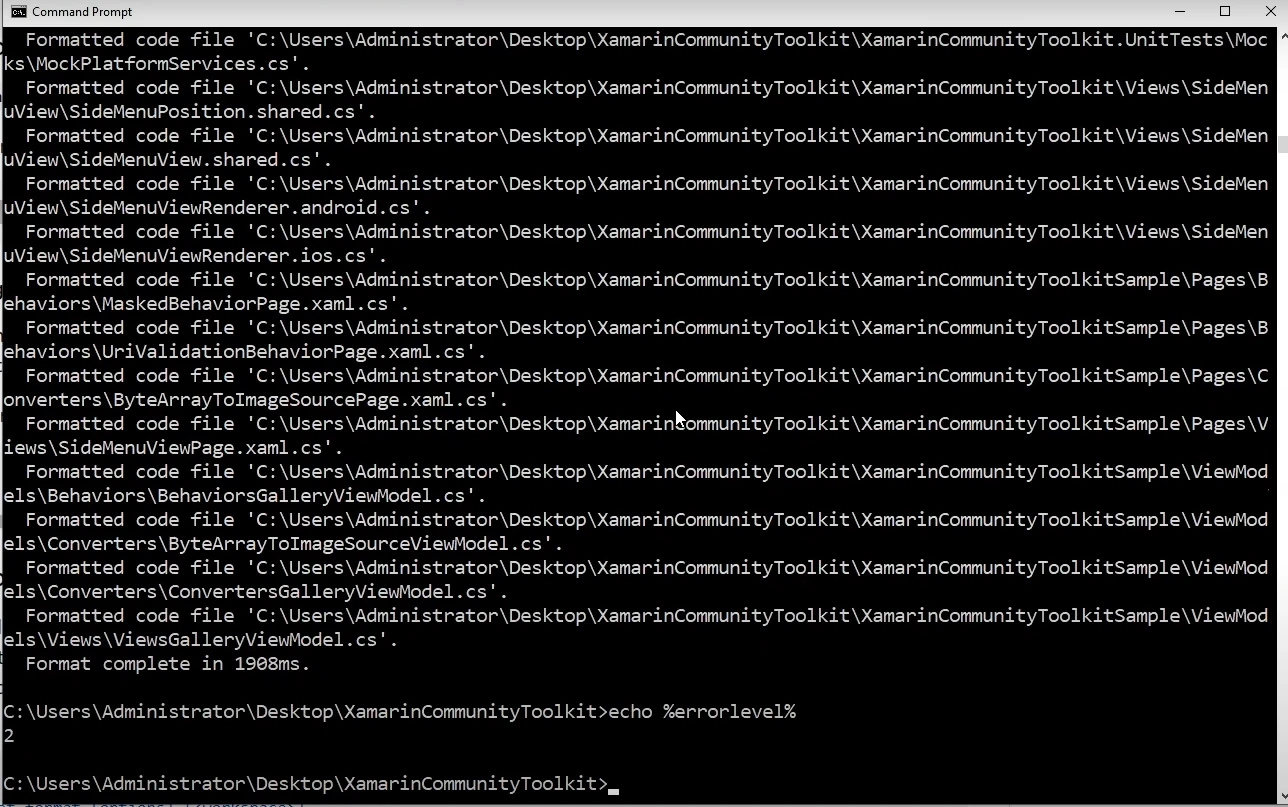
Each process that executes has an exit code indicating the status. Gerald executed the following command to check the error level:
echo %errorlevel%echo %errorlevel%Gerald demonstrates that an exit code of 2 signals that there are formatting errors that need addressing.
Applying and Verifying Fixes
Gerald then shows how to apply formatting fixes by running the command again, but without the --check flag:
dotnet format . -fdotnet format . -fThis will automatically format the code files based on the rules defined in your .editorconfig file. Gerald checks the exit code again using the same command as mentioned above, to ensure it is 0, indicating that all formatting issues have been resolved.
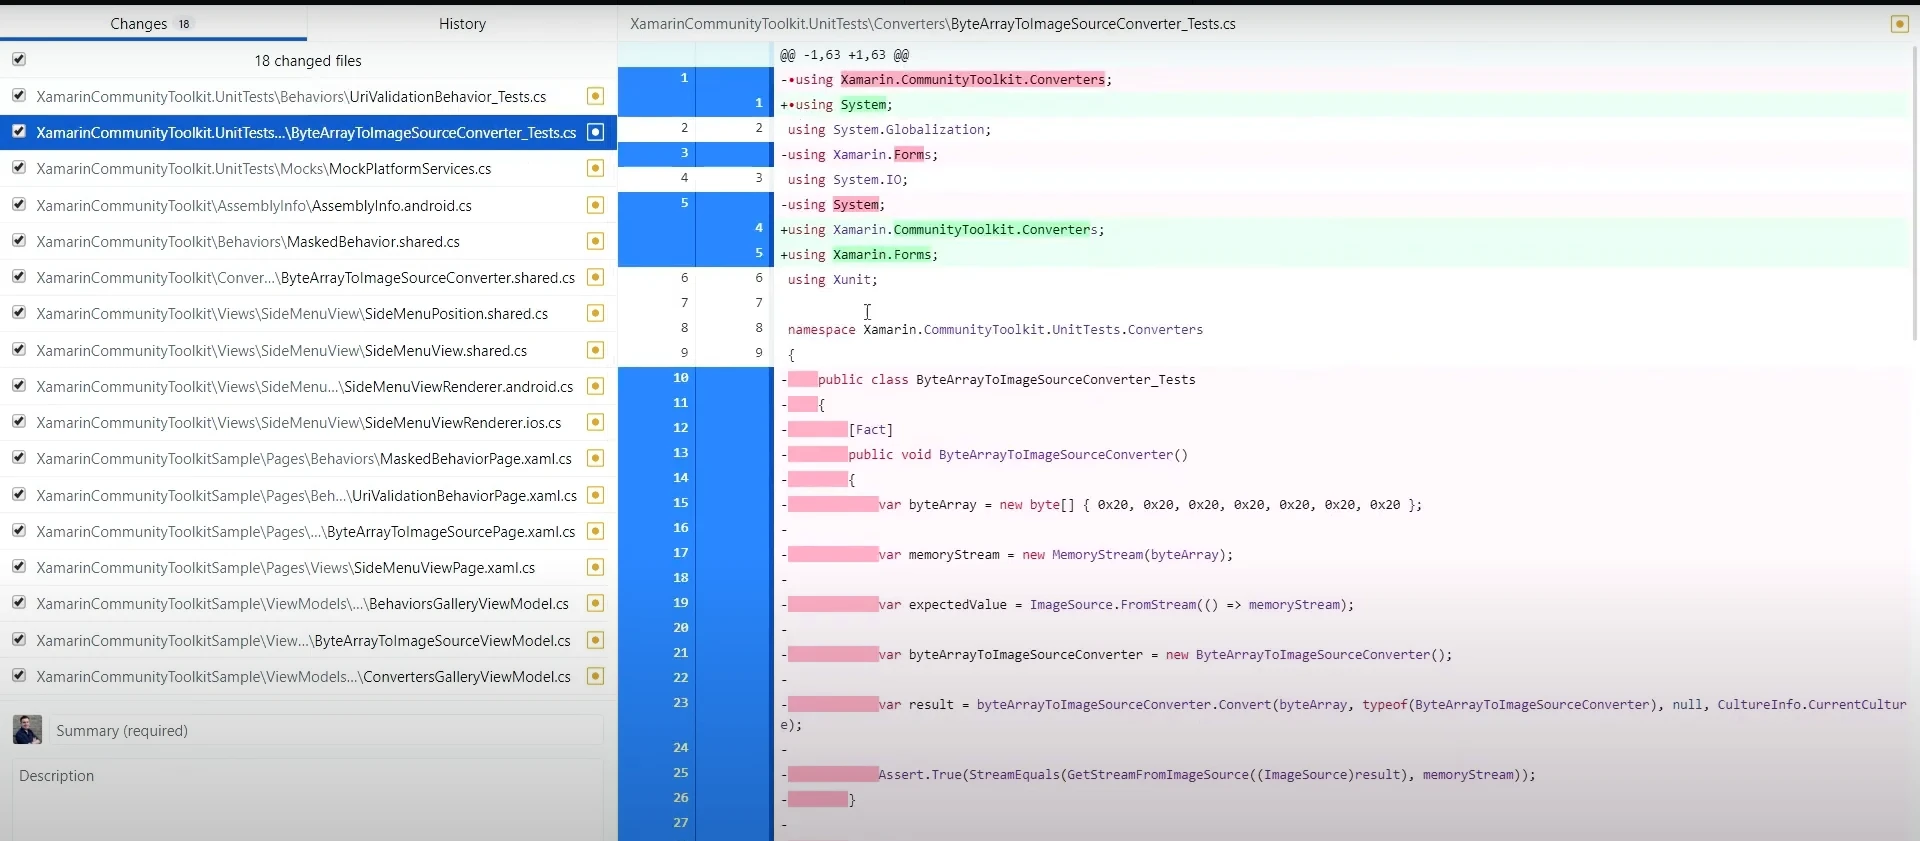
To verify the changes, at (8:00), he uses a graphical tool like GitHub Desktop to review the updated files. The tool shows improvements such as corrected whitespace, organized using statements, and other formatting adjustments.
Integrating Formatting into Your Workflow
Gerald recommends incorporating the dotnet format tool into your build CI pipeline. This practice ensures that code formatting is consistently applied and helps maintain high-quality code standards. By automating the formatting process, you can avoid manual formatting tasks and ensure that all code adheres to the defined style rules.
Conclusion
By following Gerald’s detailed walkthrough, you can easily integrate dotnet format into your development process to automate the formatting of your C# .NET code. Whether you’re working solo or as part of a team, this tool helps ensure that your code remains clean, consistent, and easy to read. Be sure to check out Gerald’s video for a hands-on demonstration and further insights into the dotnet format tool. Also do check out his YouTube Channel for more insights on C# code.
