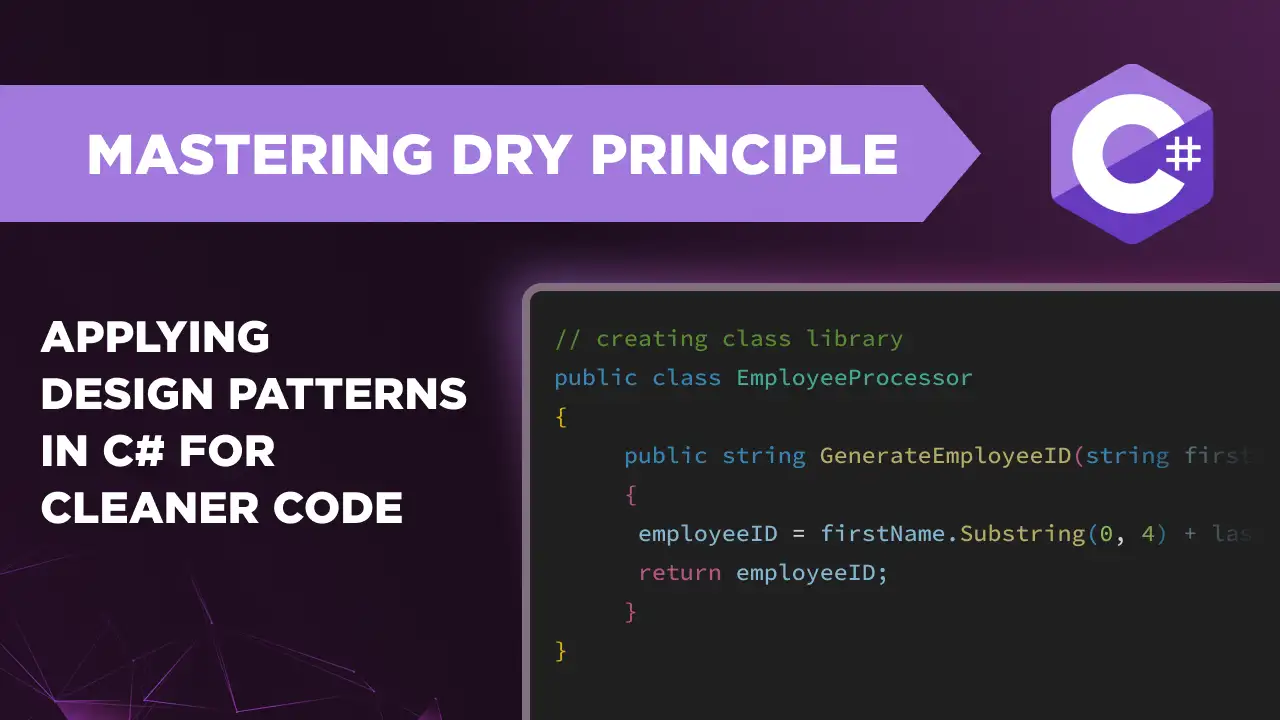
Mastering the DRY Principle: Applying Design Patterns in C# for Cleaner Code
Design patterns in C# are essential tools for writing efficient, reusable, and maintainable code. These patterns provide standard solutions to common software design problems, promoting best practices and helping developers avoid redundant code. One of the core principles in applying design patterns is the DRY (Don't Repeat Yourself) principle, which emphasizes minimizing repetition within code to enhance readability and maintainability.
This article is inspired by Tim Corey's insightful video, "Design Patterns: Don't Repeat Yourself in C#," which dives deep into the DRY principle and its practical application in creating cleaner, more organized code. By exploring the key concepts and strategies discussed in Tim's video, this article aims to provide you with a comprehensive guide to implementing the DRY design pattern principle effectively in your C# projects.
Introduction to the DRY Principle in C#
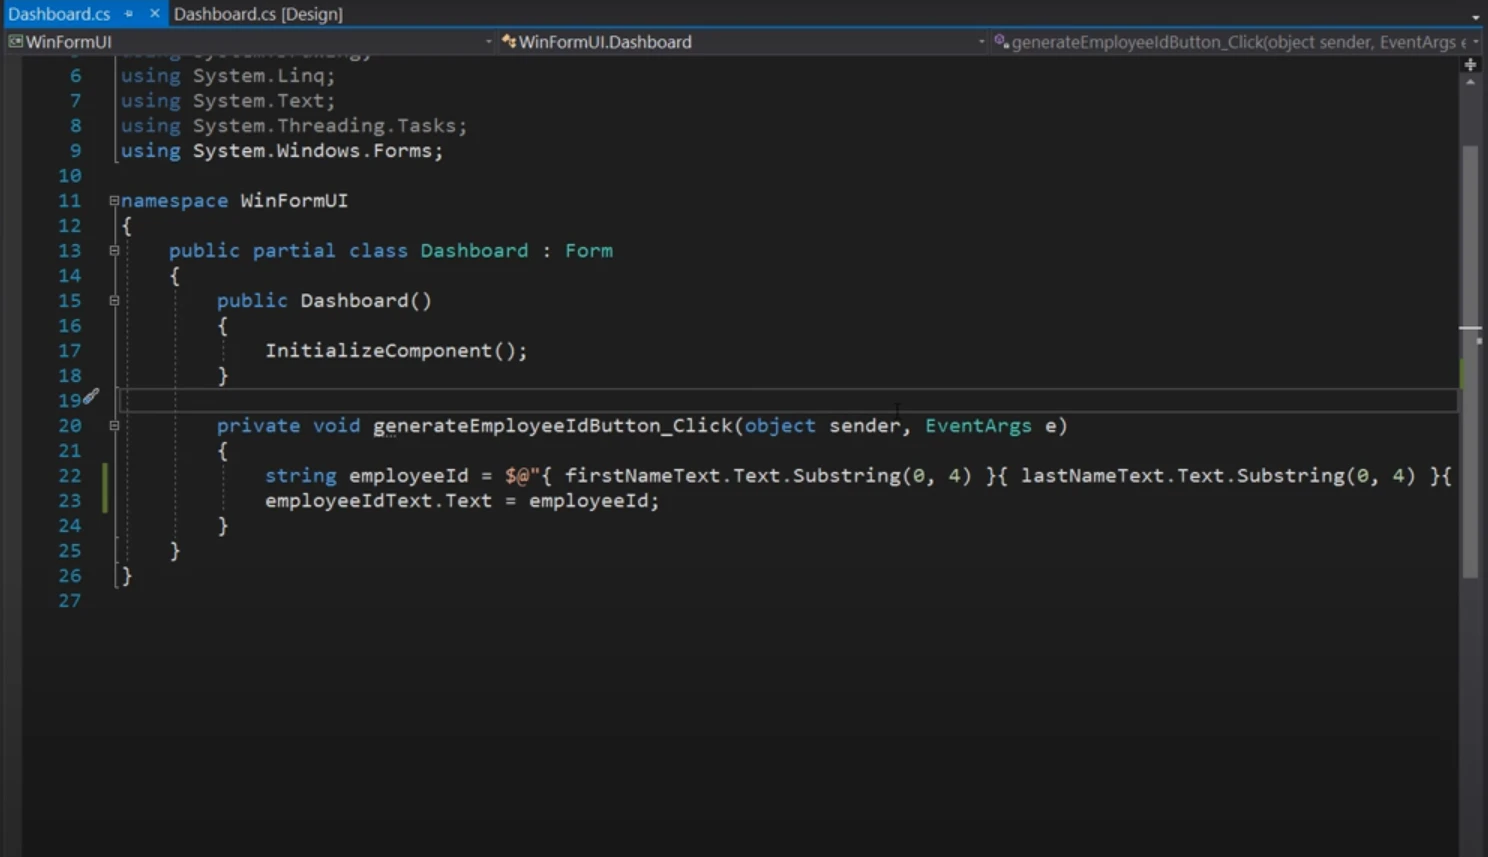
In the introduction, Tim Corey explains the DRY principle, which stands for "Don't Repeat Yourself." This principle is a fundamental concept in programming that emphasizes avoiding redundancy by ensuring that every piece of knowledge or logic is represented in a single place in the code. Tim illustrates the principle using a simple example of a WinForms application with a dashboard form. The form includes fields for entering a first name and a last name, and a button to generate an employee ID based on these fields.
Identifying and Anticipating Code Repetition
At (0:53), Tim moves on to identifying and anticipating repetition in the code. He uses the example of the WinForms application to show how repetition can occur, even when methods are called only once. In the application, the employee ID generation logic involves extracting substrings from the text fields for the first and last names and appending a 3 digit code at the end.
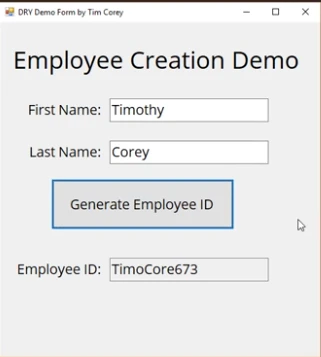
In the above screenshot at (1:31), Tim demonstrates the functionality of the application, showing how it generates an employee ID by combining the first four letters of the first name and last name with a three-digit code. He highlights that, although the code appears to follow the DRY principle because it doesn't repeat the same logic explicitly, there are underlying issues with the pattern of repetition that need to be addressed.
At (1:51), he points out that while the code seems simple, it doesn't fully adhere to the DRY principle because the logic for generating the employee ID is tightly coupled with the click event of the button. This means that if this logic were needed elsewhere in client code, such as when processing a list of new employees (3:58), the code would need to be repeated or adapted, leading to redundancy.
Creating Independent, Reusable Methods
In this segment, Tim Corey demonstrates how to create an independent, reusable method to adhere to the DRY principle. He begins by extracting the logic for generating an employee ID from the event handler into a separate method. This refactoring involves creating a private method named GenerateEmployeeID and moving the existing code into this method (5:15). The revised code in the event handler then simply calls this method.
Steps and Example:
Initial Code: The logic for generating the employee ID was directly in the click event handler of a button.
Refactored Code: Tim improves the method by making it more flexible. Instead of relying on specific UI elements, the method now accepts
firstNameandlastNameas parameters and returns the generated ID. This change allows the method to be used in various contexts and UI elements:private string GenerateEmployeeID(string firstName, string lastName) { string employeeID = firstName.Substring(0, 4) + lastName.Substring(0, 4) + DateTime.Now.Millisecond.ToString(); return employeeID; }private string GenerateEmployeeID(string firstName, string lastName) { string employeeID = firstName.Substring(0, 4) + lastName.Substring(0, 4) + DateTime.Now.Millisecond.ToString(); return employeeID; }Tim then demonstrates how this method is called from the click event:
employeeIdText.Text = GenerateEmployeeID(firstNameText.Text, lastNameText.Text);employeeIdText.Text = GenerateEmployeeID(firstNameText.Text, lastNameText.Text);He also notes that this method can now be used in other parts of the application, such as in processing CSV files with multiple employee records, without repeating the code.
Building and Using a Class Library
Tim Corey then explores the concept of a class library to further enhance code reuse and maintainability. He illustrates how to encapsulate the GenerateEmployeeID method into a class library object, which can be used across multiple projects.
At (8:00), Tim explains that the design keeps on changing based on the requirements of the user or by company policies to make it more interactable with graphics and animations. So, he introduces a WPF project within the solution with exact fields and a button to Generate Employee ID.
Tim at (9:15), makes a strong case for using a class library by saying if we are to avoid repeating ourselves, then the code would have been copy-pasted in the new WPF project. So, to keep it DRY we need to create classes in a class library.
Steps and Example:
Creating the Class Library:
Tim at (9:47), creates a new class library project in .NET Framework, naming it DRYDemoLibrary.
Inside this library, he defines a public class
EmployeeProcessorand moves theGenerateEmployeeIDmethod into this class:public class EmployeeProcessor { public string GenerateEmployeeID(string firstName, string lastName) { string employeeID = firstName.Substring(0, 4) + lastName.Substring(0, 4) + DateTime.Now.Millisecond.ToString(); return employeeID; } }public class EmployeeProcessor { public string GenerateEmployeeID(string firstName, string lastName) { string employeeID = firstName.Substring(0, 4) + lastName.Substring(0, 4) + DateTime.Now.Millisecond.ToString(); return employeeID; } }
Using the Class Library in Projects:
In his WinForms (13:18) and WPF projects (14:00), Tim adds a reference to the DRYDemoLibrary class library.
He then replaces the old code with calls to the
GenerateEmployeeIDmethod from the class library:EmployeeProcessor processor = new EmployeeProcessor(); employeeIDText.Text = processor.GenerateEmployeeID(firstNameText.Text, lastNameText.Text);EmployeeProcessor processor = new EmployeeProcessor(); employeeIDText.Text = processor.GenerateEmployeeID(firstNameText.Text, lastNameText.Text);- This approach eliminates redundancy, as the method is now maintained in a single place. Tim demonstrates that the same class library can be used across different UI frameworks (WinForms and WPF) without repeating the code.
Advantages:
Consistency: By centralizing the logic in a class library, Tim ensures that changes to the logic (e.g., bug fixes) are applied uniformly across all projects.
- Reduced Maintenance: Changes in the method only need to be made in the class library, avoiding inconsistencies and reducing maintenance overhead.
Integrating the Class Library into Multiple Projects
Tim Corey continues to explore how to use the DRYDemoLibrary class library in different types of projects, specifically focusing on integrating the library into a new console application. This demonstrates how the library's functionality can be reused across various applications, not only a single instance or just those within the same solution.
Steps and Example:
Creating a New Solution and Project:
Tim at (17:29), starts by creating a new solution for a console application, simulating a scenario where you might need to use the DRYDemoLibrary in a different type of project, like a Windows service or console app.
He names the new project ConsoleUI and shows how to set up a basic console application.
class Program
{
 static void Main(string[] args)
 {
    Console.ReadLine();
 }
}
class Program { static void Main(string[] args) { Console.ReadLine(); } }
Adding a Reference to the Class Library:
Tim explains how to add a reference to the DRYDemoLibrary DLL in the new project. This involves browsing to the DLL file in the bin folder of the class library project and adding it to the console application.
using DRYDemoLibrary;using DRYDemoLibrary;Once the reference is added, Tim (19:24) uses the EmployeeProcessor class from the library to generate an employee ID based on user input.
Console.WriteLine("What is your first name?");
string firstName = Console.ReadLine();

Console.WriteLine("What is your last name?");
string lastName = Console.ReadLine();

EmployeeProcessor processor = new EmployeeProcessor();
string employeeID = processor.GenerateEmployeeID(firstName, lastName);

Console.WriteLine($"Your employee ID is {employeeID}");
Console.WriteLine("What is your first name?"); string firstName = Console.ReadLine(); Console.WriteLine("What is your last name?"); string lastName = Console.ReadLine(); EmployeeProcessor processor = new EmployeeProcessor(); string employeeID = processor.GenerateEmployeeID(firstName, lastName); Console.WriteLine($"Your employee ID is {employeeID}");
Running the Console Application:
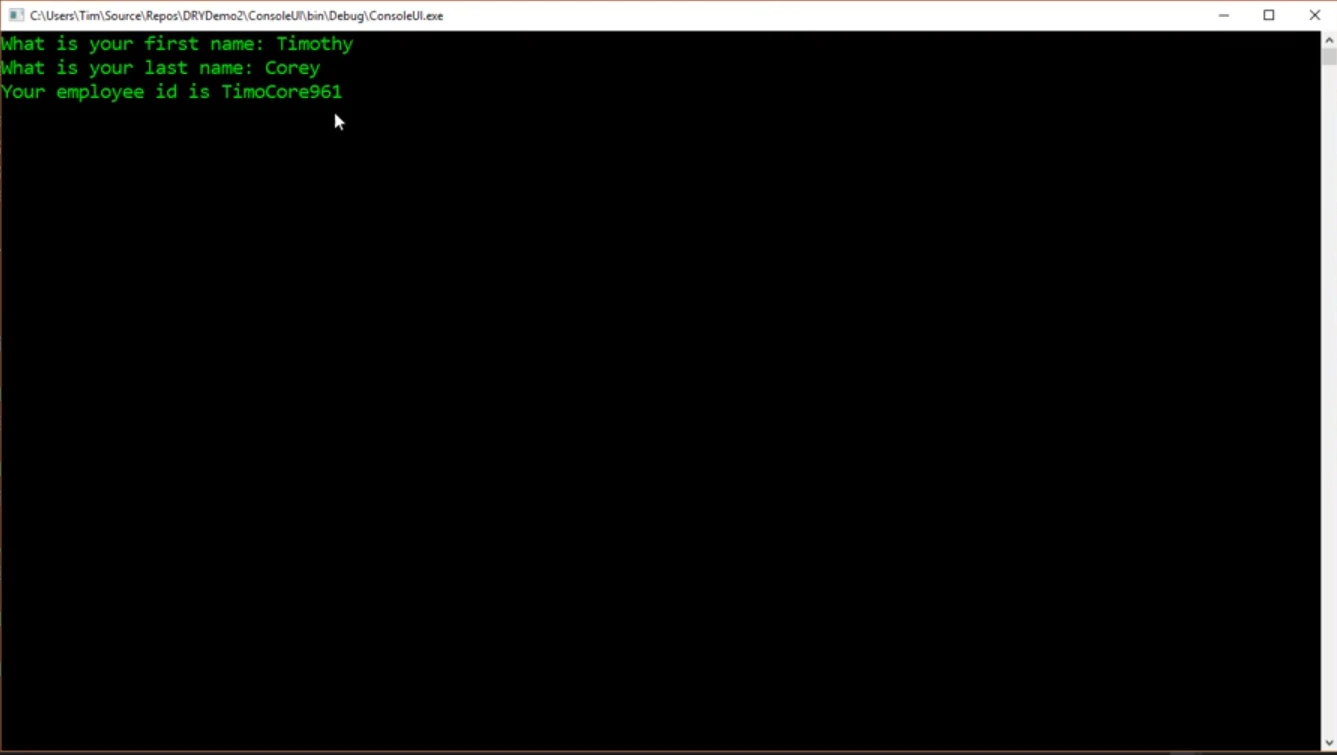
Tim demonstrates running the console application to show that it successfully generates the employee ID using the library. This confirms that the same code from the class library can be reused across different projects.
Updating the DLL:
- Tim briefly mentions that if the DLL changes, you can update it in the projects that reference it. He notes that while this video doesn’t cover it in detail, using NuGet packages is a recommended approach for managing and updating DLLs across multiple projects.
Updating DLLs and Managing NuGet Packages
Tim Corey briefly introduces the concept of using NuGet packages for managing and updating class libraries. This approach offers a more scalable solution for handling dependencies and updates, especially in larger projects or organizations.
Key Points:
Creating a NuGet Package:
- Instead of manually managing DLL files, Tim suggests creating a NuGet package for the class library. This involves packaging the DLL into a NuGet package and uploading it to a NuGet server (private or public).
Updating Packages:
- By using a NuGet package, you can update the library across all projects that reference it simply by updating the package version. This ensures consistency and reduces the risk of version mismatches or missing updates.
Benefits:
Centralized Management: NuGet packages provide a centralized way to manage library versions and dependencies.
Ease of Updates: Updating the library across multiple projects becomes easier and more reliable.
- Integration: NuGet integrates with various development tools and environments, streamlining the process of managing library dependencies.
Implementing DRY in Unit Testing: A Crash Course
In this segment, Tim Corey demonstrates how applying the DRY (Don't Repeat Yourself) principle can enhance unit testing. He shows how to implement DRY principles in development work, especially focusing on unit tests.
Initial Test Setup
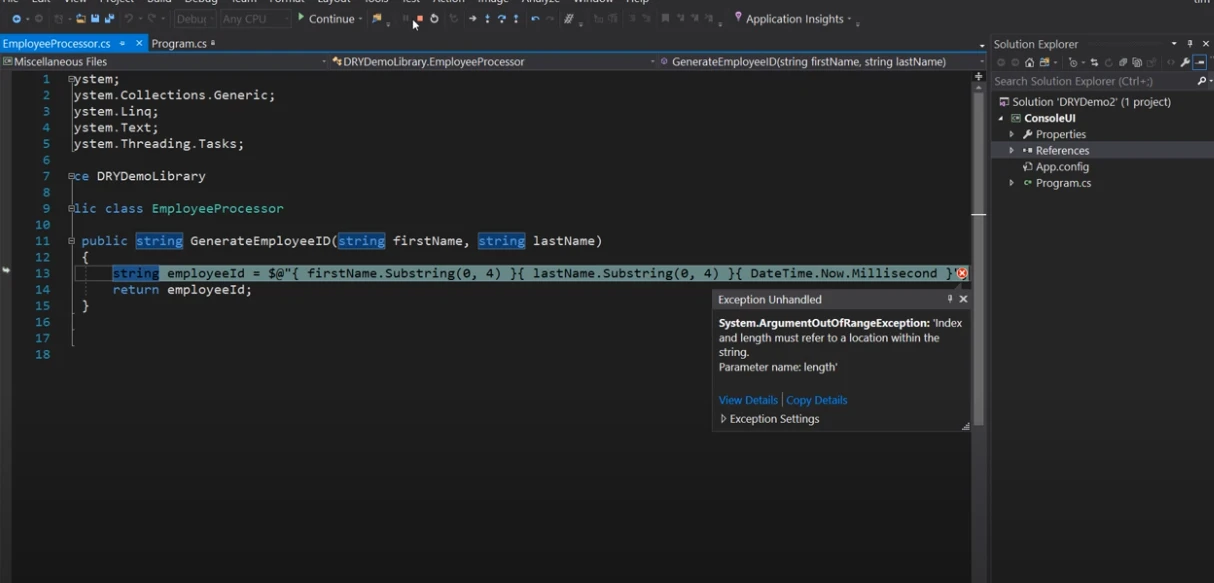
Tim begins by running a unit test that currently fails due to a bug in the DLL. He highlights the importance of unit tests in identifying problems, even when the code is outside the main solution. The code was expecting a 4-letter input but instead Tim passed a 3-letter first name which crashes in the DLL file even if it's not directly included in the solution.
Refactoring Code to Address Bugs
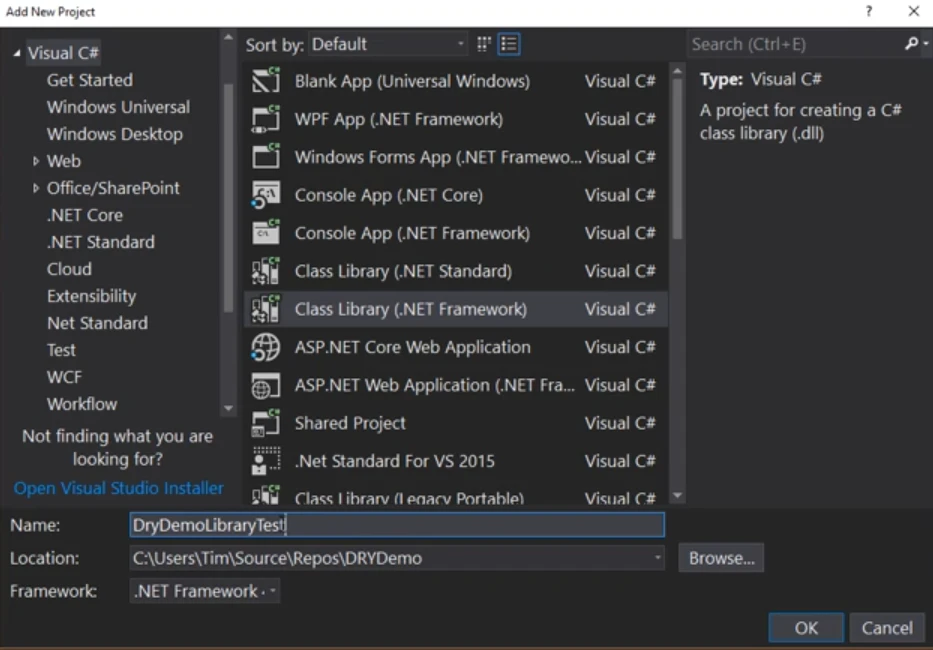
To address the issue with first name handling, Tim refactors the code. He explains how DRY can be applied to development by creating a new class library project (23:50). This approach ensures that changes to multiple objects can be made once and tested effectively without repeating fixes.
Adding Unit Tests
Tim introduces a new test class as EmployeeProcessorTest in the class library project and sets up unit tests using XUnit. He demonstrates how to create a test method for generating employee IDs and discusses the importance of mocking dependencies instead of relying on actual values.
Writing a Test Method
Tim writes a unit test method called GenerateEmployeeID_ShouldCalculate. He sets up a theory with inline data to test different scenarios, ensuring the method returns the expected results. He also explains how to use Assert.Equal to verify the output.
public class EmployeeProcessorTest
{
   [Theory]
   [InlineData("Timothy", "Corey", "TimoCore")]
   public void GenerateEmployeeID_ShouldCalculate(string firstName, string lastName, string expectedStart)
   {
      // Arrange
      var processor = new EmployeeProcessor();

      // Act
      var actualStart = processor.GenerateEmployeeID(firstName, lastName).Substring(0, 8);

      // Assert
      Assert.Equal(expectedStart, actualStart);
   }
}
public class EmployeeProcessorTest
{
[Theory]
[InlineData("Timothy", "Corey", "TimoCore")]
public void GenerateEmployeeID_ShouldCalculate(string firstName, string lastName, string expectedStart)
{
// Arrange
var processor = new EmployeeProcessor();
// Act
var actualStart = processor.GenerateEmployeeID(firstName, lastName).Substring(0, 8);
// Assert
Assert.Equal(expectedStart, actualStart);
}
}Running the Unit Test
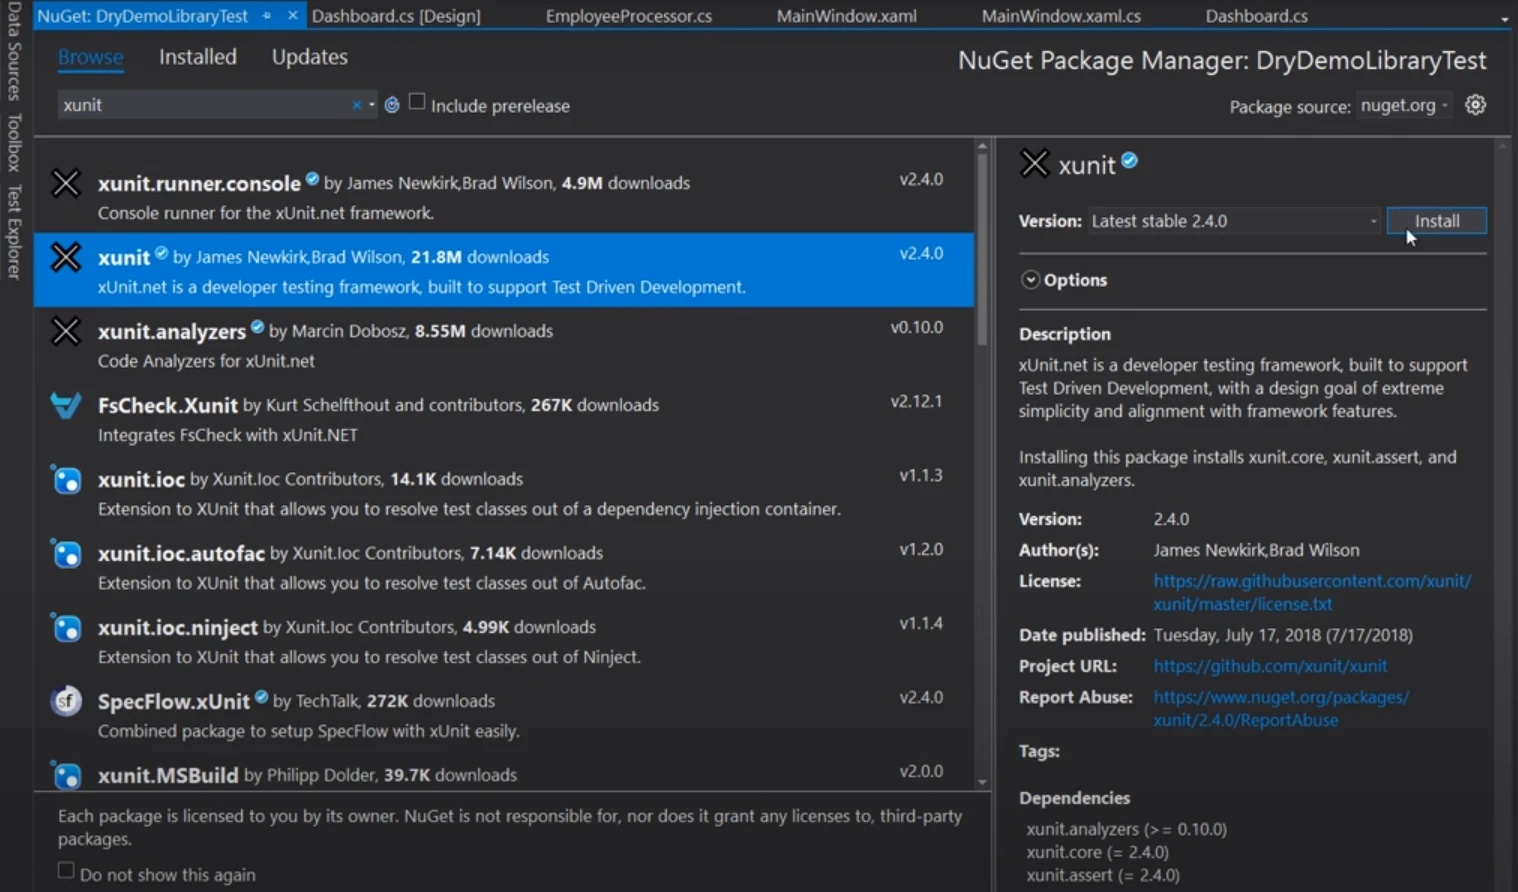
Tim emphasizes the importance of mocking dynamic data, like date-time values, to control test conditions and outcomes. He discusses the challenge of working with dynamic strings and how to test different scenarios using controlled values. He then runs the unit test but before this he adds two NuGet packages that are necessary to run the tests: xunit.runner.console and xunit.runner.visualstudio.
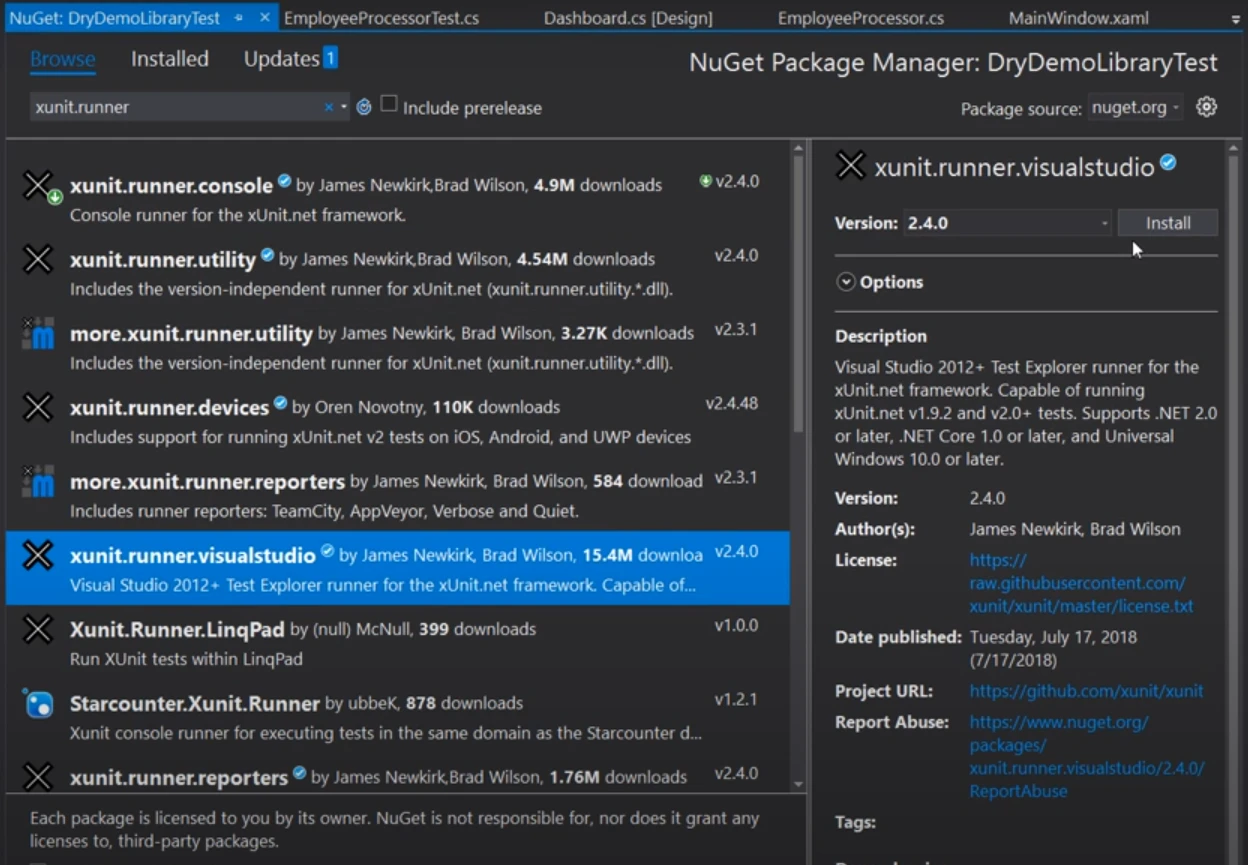
After successfully running all the tests for one inline data, the output is shown as follows:
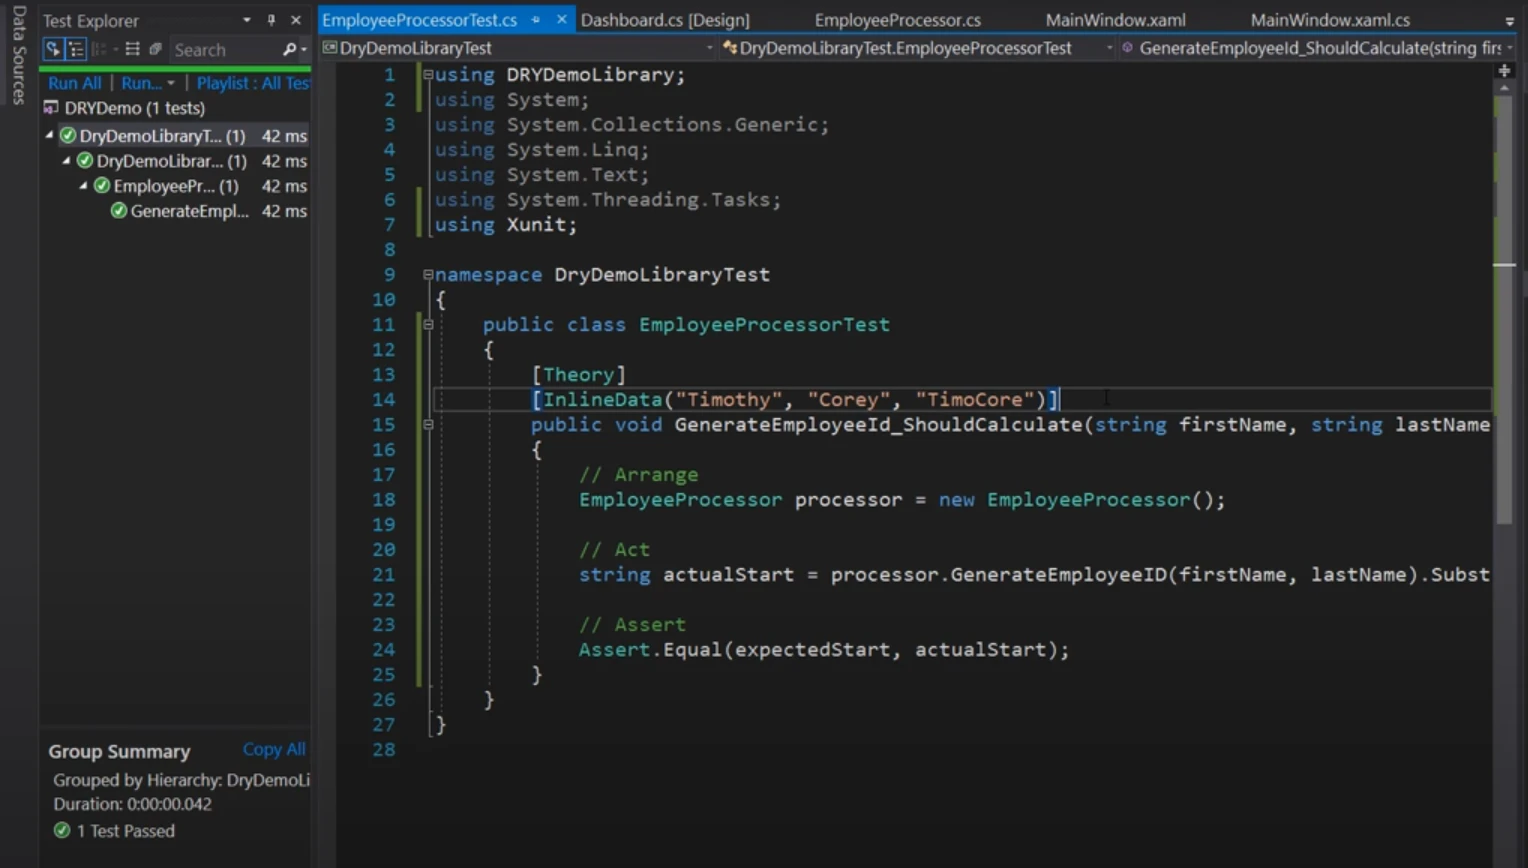
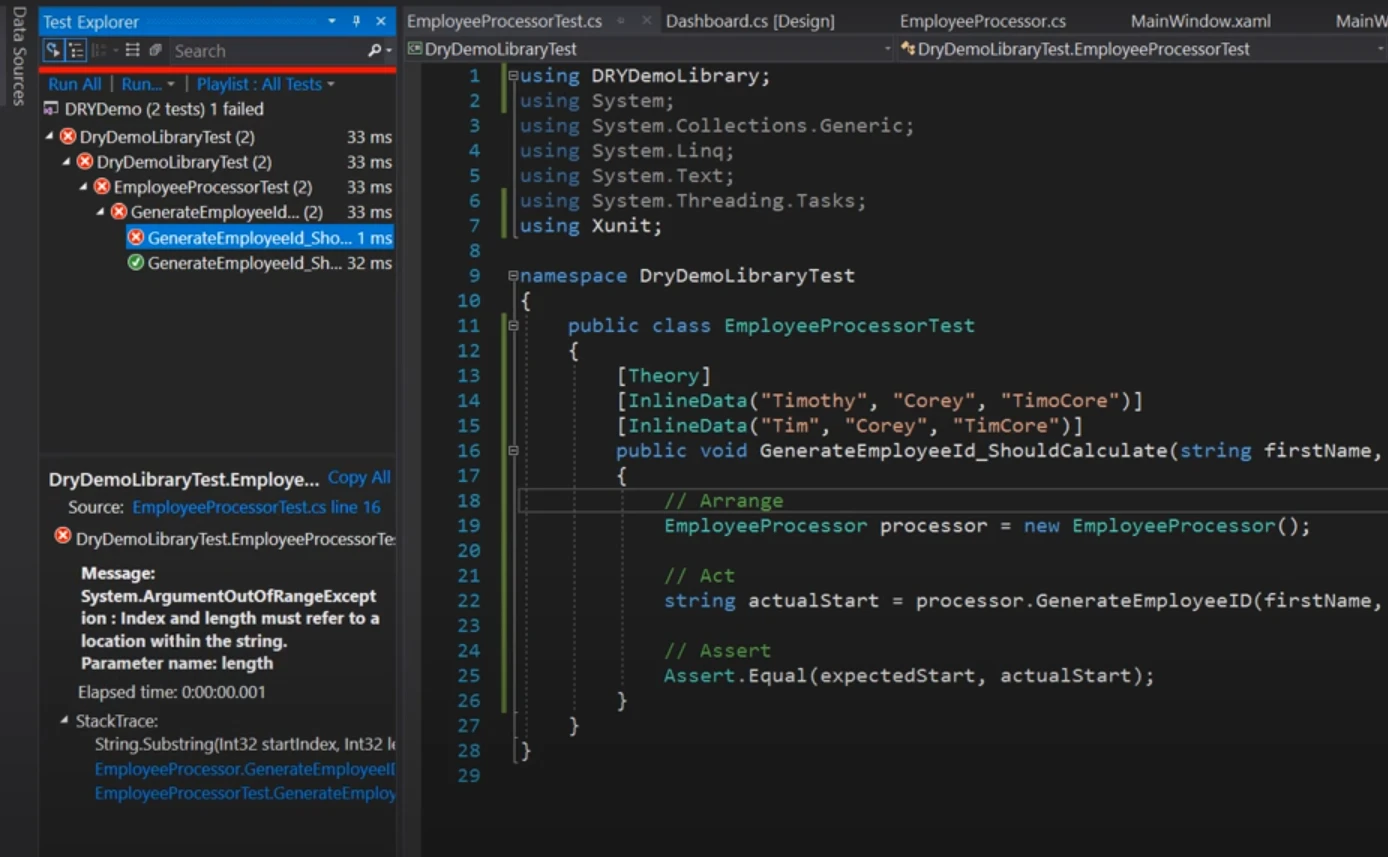
Now at (31:30), Tim added another inline data and changed the substring second parameter to expectedStart.Length:
public class EmployeeProcessorTest
{
   [Theory]
   [InlineData("Timothy", "Corey", "TimoCore")]
   [InlineData("Tim", "Corey", "TimCore")]
   public void GenerateEmployeeID_ShouldCalculate(string firstName, string lastName, string expectedStart)
   {
      var processor = new EmployeeProcessor();
      var actualStart = processor.GenerateEmployeeID(firstName, lastName).Substring(0, expectedStart.Length);
      Assert.Equal(expectedStart, actualStart);
   }
}
public class EmployeeProcessorTest
{
[Theory]
[InlineData("Timothy", "Corey", "TimoCore")]
[InlineData("Tim", "Corey", "TimCore")]
public void GenerateEmployeeID_ShouldCalculate(string firstName, string lastName, string expectedStart)
{
var processor = new EmployeeProcessor();
var actualStart = processor.GenerateEmployeeID(firstName, lastName).Substring(0, expectedStart.Length);
Assert.Equal(expectedStart, actualStart);
}
}After running the unit test again at (32:05), with second theory the test broke:
Improving Code with Private Methods
To adhere to DRY, Tim refactors the code further by creating a private method GetPartOfName in the actual EmployeeProcessor class under DRYDemoLibrary. This method handles the extraction of parts of a name, improving code reusability and readability. Tim made the following changes:
public string GenerateEmployeeID(string firstName, string lastName)
{
   string employeeID = $@"{GetPartOfName(firstName, 4)}{GetPartOfName(lastName, 4)}{DateTime.Now.Millisecond.ToString()}";
   return employeeID;
}

private string GetPartOfName(string name, int numberOfCharacters)
{
   string output = name;

   if (name.Length > numberOfCharacters)
   {
      output = name.Substring(0, numberOfCharacters);
   }

   return output;
}
public string GenerateEmployeeID(string firstName, string lastName)
{
string employeeID = $@"{GetPartOfName(firstName, 4)}{GetPartOfName(lastName, 4)}{DateTime.Now.Millisecond.ToString()}";
return employeeID;
}
private string GetPartOfName(string name, int numberOfCharacters)
{
string output = name;
if (name.Length > numberOfCharacters)
{
output = name.Substring(0, numberOfCharacters);
}
return output;
}Updating Unit Tests
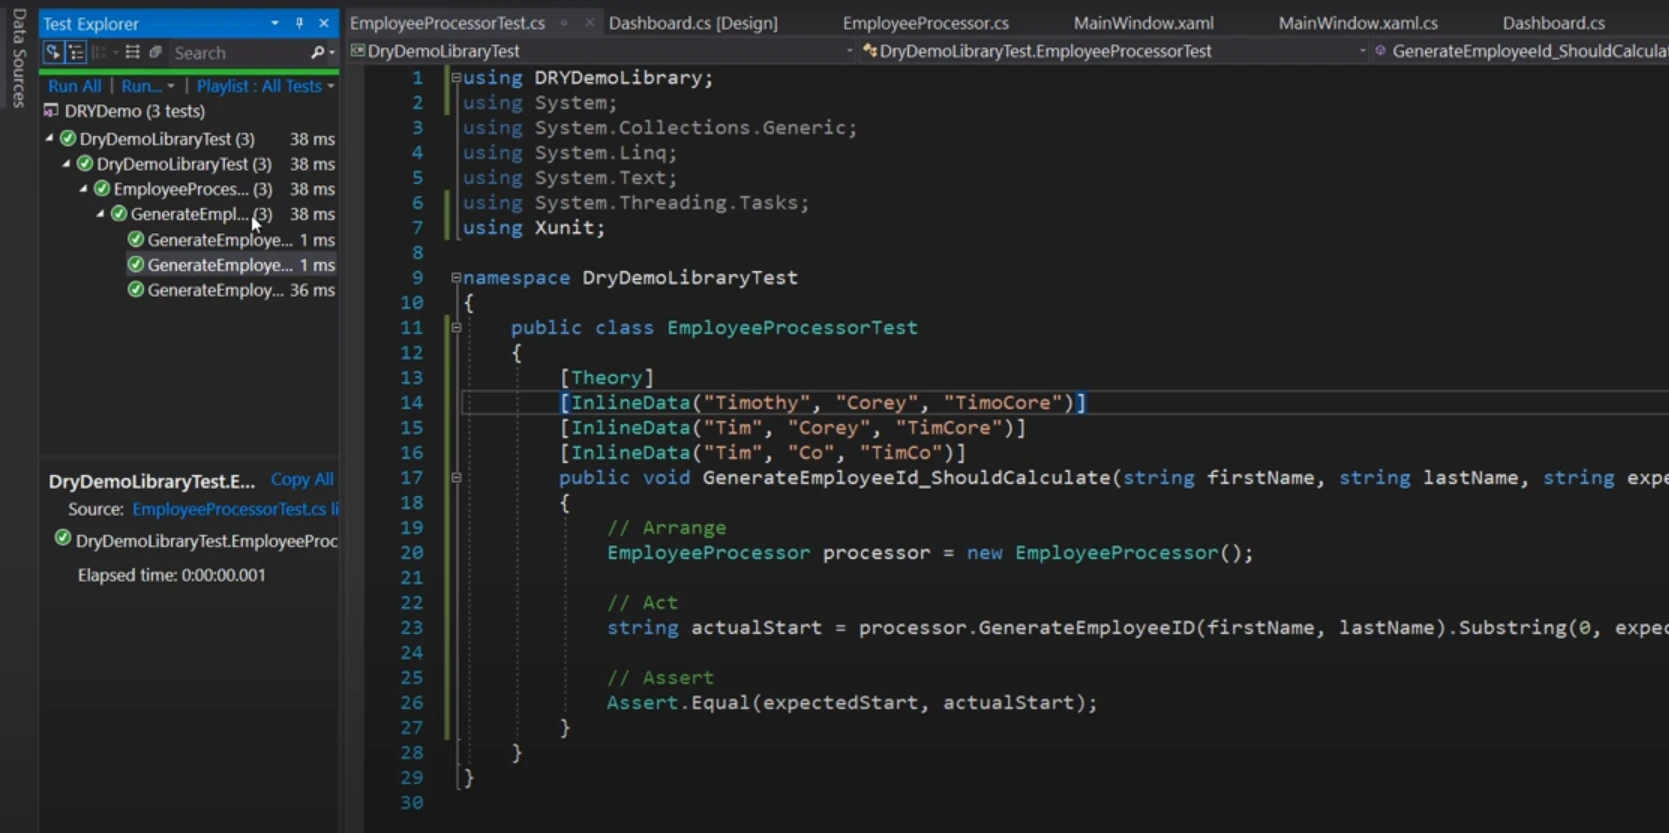
Tim updates the unit tests to reflect changes in the code, such as modifying the expected length of substrings. He explains how running these tests helps quickly identify issues and validate that the code meets the new requirements. Tim adds new theories and then run the unit tests to verify if the outputs are expected:
Expanding Versatility with .NET Standard Libraries
Creating a .NET Standard Library
To enhance the versatility of your class library, Tim Corey recommends transitioning from a .NET Framework class library to a .NET Standard class library. This change allows the library to be compatible across various platforms, including:
- Windows Platforms: WinForms, WPF, and Console Applications
- Cross-Platform: .NET Core, Xamarin (for iOS and Android), Linux, and macOS
Steps to Create a .NET Standard Library:
- Add New Project: Right-click on your solution and choose to add a new project.
Select .NET Standard: Instead of selecting a .NET Framework class library, choose .NET Standard. This library type supports a wide range of platforms.
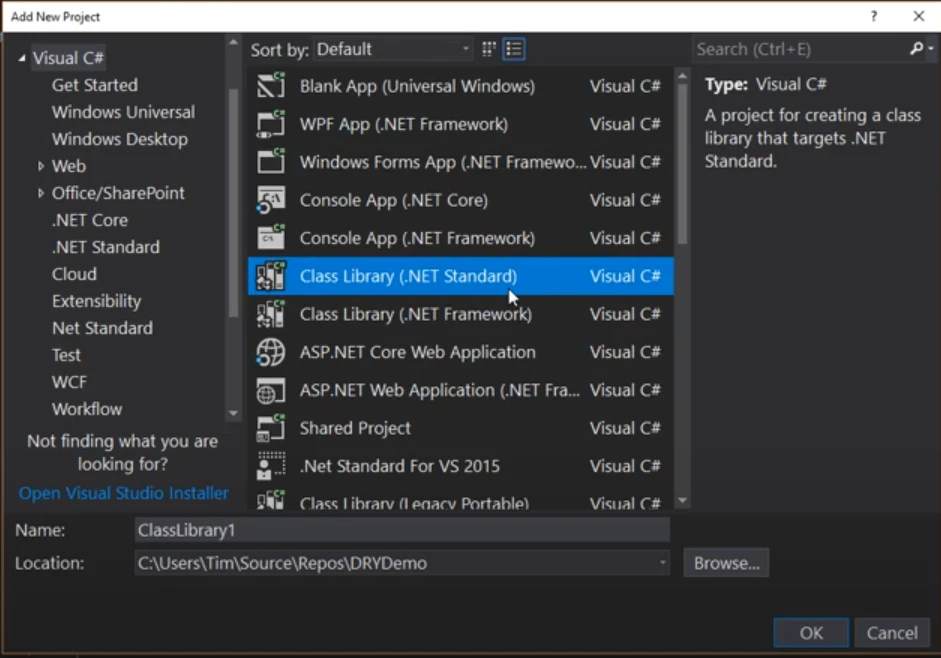
- Code Migration: Copy and paste your existing code (e.g., EmployeeProcessor class) into the new .NET Standard library. This process may involve minor adjustments, but the core logic remains consistent.
By converting to .NET Standard, you make your library accessible from various platforms, reducing code repetition across different application types and saving development effort.
Avoiding Repetition in Code and Testing
Reducing Repetition in Development
Tim Corey emphasizes that by adopting a .NET Standard library, you minimize code repetition not just in your codebase, but also in the development process. Instead of duplicating code across different platform-specific projects, you centralize it in a single library that works across multiple environments.
Benefits:
- Unified Codebase: One codebase for various platforms reduces the effort required to maintain and update your code.
- Simplified Testing: With a .NET Standard library, you can write unit tests once and ensure they apply to all supported platforms.
Testing and Debugging: Tim introduces unit testing as a way to further reduce effort and repetition. Automated tests verify your code’s correctness without needing to manually test each application iteration.
Tips on Applying DRY: Knowing When to Stop
Tim Corey emphasizes that while following the DRY (Don't Repeat Yourself) principle is crucial for writing maintainable code, it's important to know when and where to apply it. Not every scenario requires the same approach, so here are some practical tips inspired by Tim's insights:
Avoid Code in Code-Behind and UI: Tim advises against placing logic directly in the code-behind files or user interfaces. For instance, business logic should not be embedded in a form or button click event. Instead, keep such logic in separate classes or libraries. This separation helps maintain a clean architecture and makes your code more reusable across different user interfaces.
Leverage .NET Standard Libraries: When creating libraries, Tim suggests using .NET Standard libraries instead of .NET Framework libraries when possible. .NET Standard libraries are more versatile, allowing your code to be used across different platforms, including .NET Core, Xamarin, and more. This approach reduces code duplication and enhances code portability.
Separate Platform-Specific Code: Some code may not fit into a .NET Standard library due to platform-specific requirements, such as file handling or configuration management. Tim recommends creating two libraries in such cases: one for .NET Standard code and another for platform-specific code. This way, you can still reuse the core logic while accommodating platform-specific needs.
Emphasize Unit Testing: Tim strongly encourages writing unit tests for your code. Unit tests help identify bugs early and ensure that your code behaves as expected. They can significantly speed up the debugging process, as you can quickly verify changes without manually testing the entire application.
- Consider the Project Size: For very small or experimental projects, Tim acknowledges that the overhead of creating separate libraries and extensive unit tests might not be necessary. However, for production applications, starting with a clean architecture and unit testing is advisable, as small projects often grow and evolve over time.
By following these tips, you can apply the DRY principle effectively while balancing the need for code reuse and maintainability with practical considerations.
Conclusion
Mastering the DRY principle through design patterns is essential for writing clean and maintainable C# code. As demonstrated by Tim Corey, applying DRY effectively involves creating reusable methods, leveraging class libraries, and embracing .NET Standard for broader compatibility. By understanding when and how to apply these practices, you can significantly enhance the quality and flexibility of your code.
For more in-depth insights, check out Tim Corey’s video on this topic here. To stay updated with Tim’s latest content, visit his YouTube channel.
