Creating a C# Application
Windows Forms App is a graphical user interface API included as a part of Microsoft's .NET Framework. It provides a platform for creating rich desktop applications and Tim Corey’s video on "Intro to Windows Forms in .NET 6" offers a comprehensive introduction to building applications using this technology. Below is an in-depth look into the concepts covered in the video, inspired by Tim's video.
Getting Started with Windows Forms
Tim Corey begins his tutorial by setting up a new Windows Forms project in .NET 6. The starting point includes creating a new project in Visual Studio by selecting create, then choosing the appropriate templates, and finally setting up the initial form (Form1). This is crucial for beginners to understand how to initiate a project and get their first form up and running.
Setting up the Project:
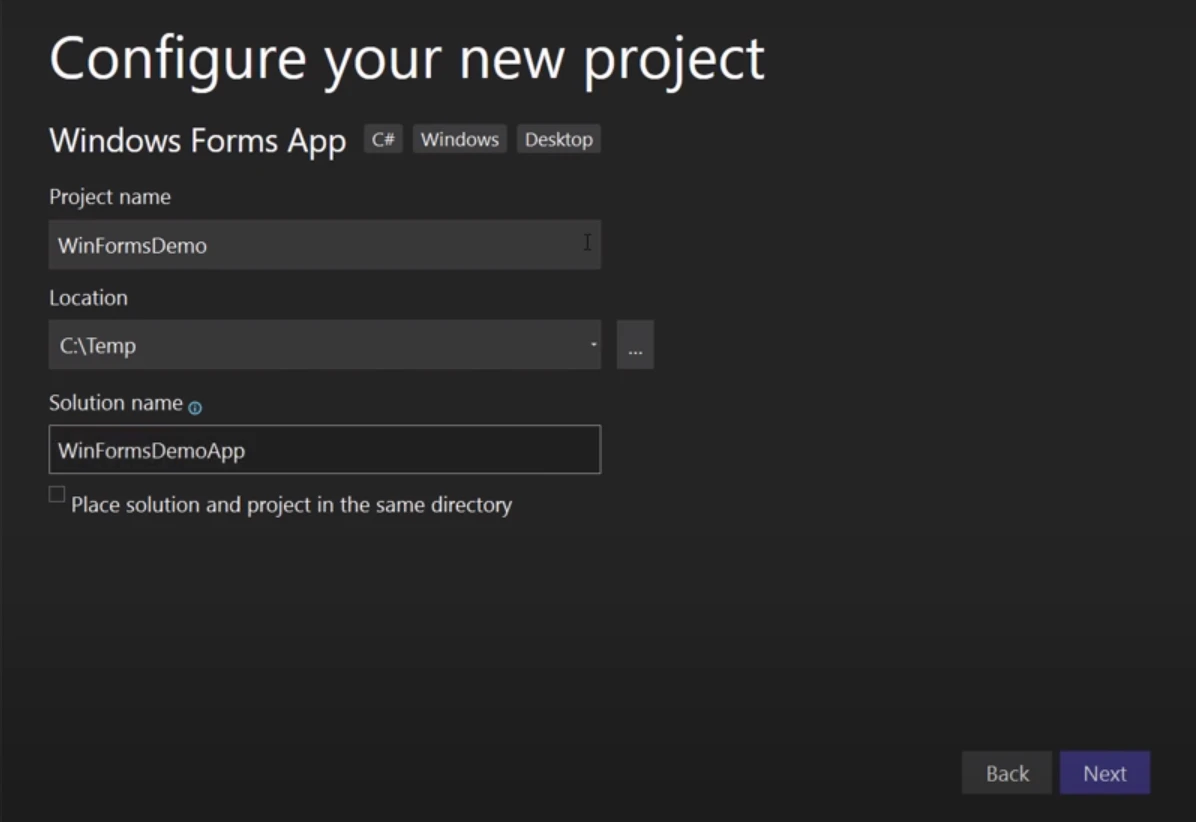
Tim walks through the process of creating a new project in Visual Studio, emphasizing the importance of selecting the correct templates and configurations for Windows Forms applications. This includes selecting the type "Windows Forms App," naming the project appropriately, in this case naming it "WinFormsDemoApp," and choosing .NET 6.0 as the target framework (2:05).

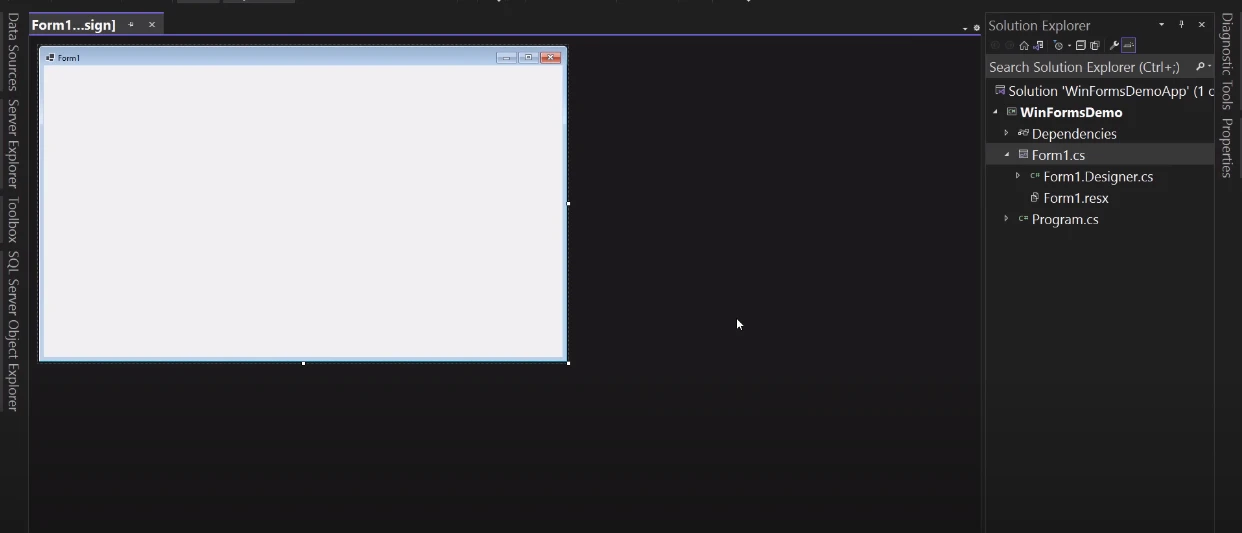
After clicking create when the project window shows up, you'll find a default Windows Form with all the template files in the solution explorer window on the left side of the code editor. The default form is based on the basic Windows user interface structure, with a title bar containing the title of the Windows Forms application and minimize, maximize, and close button controls.

Rapid Application Development with Windows Forms
Tim in his video explores the concept of Rapid Application Development (RAD) using Windows Forms, emphasizing its ease and efficiency for creating prototypes and proof of concepts.
Understanding Rapid Application Development
Tim begins by discussing the concept of RAD, which focuses on quickly developing applications to validate ideas and functionalities.
Creating a Proof of Concept
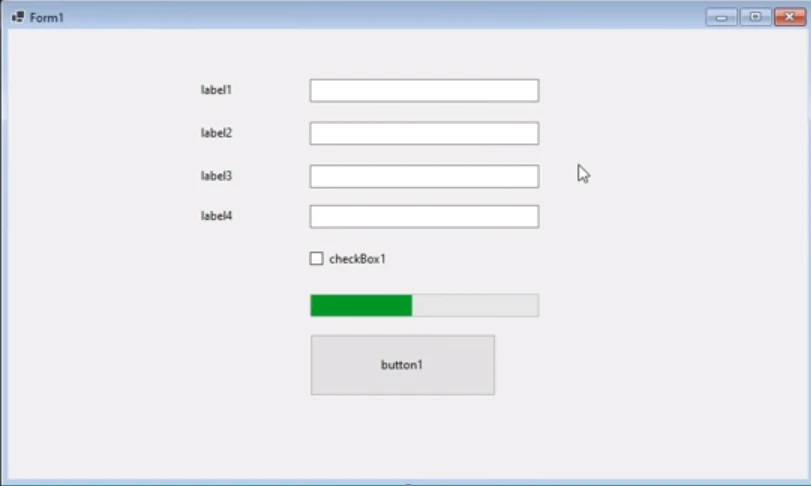
Utilizing the Toolbox window: Tim demonstrates how developers can leverage the Toolbox window in Visual Studio, which contains a variety of controls essential for application development.
- Drag-and-Drop Functionality: He illustrates the process of adding controls by dragging and dropping them onto the design surface, such as buttons, text boxes, labels, and checkboxes.
Building a Basic Application
Layout and Design: Tim explains the flexibility of arranging controls on the form, aligning them using Visual Studio's alignment guides.
- Copying and Pasting Controls: He shows how developers can quickly duplicate controls using keyboard shortcuts like Ctrl+C and Ctrl+V, streamlining the design process.
Functional Elements
Configuring Controls: Tim exemplifies configuring controls like the Progress Bar by adjusting properties directly within the Properties window. This interaction demonstrates real-time changes to the application's visual components.
- Interactive Preview: By running the application, Tim showcases how these basic components can be used interactively, even if their functionality is not yet fully implemented.

Designer Broke Error
Tim Corey explains the various ways in which the Windows Forms designer can break and how developers typically encounter this issue.
Unexpected Modifications: If developers accidentally delete or modify crucial parts of the auto-generated code in Form1.Designer.cs, such as event handlers or control initialization code, it can cause the designer to fail.
- Inconsistent Code Changes: Errors may arise when there are discrepancies between manually edited code and the code generated by the designer. For example, removing an event handler in one partial class (Form1.cs) but not in the other (Form1.Designer.cs) can lead to a mismatch that prevents the form from loading correctly in the designer.
Reading Error Messages
Tim Corey underscores the importance of carefully interpreting error messages provided by Visual Studio when dealing with issues related to the Windows Forms designer.
Error Message Details: Tim highlights specific error messages like "The designer cannot process unknown name 'form1_load' at line 153," which indicate where and why the designer encountered a problem.
- Guidance for Resolution: Error messages often provide actionable steps, such as reverting changes made to the generated code or ensuring consistency across all partial classes (Form1.cs and Form1.Designer.cs).
Removing Event Handler from Other Partial Class as well
Tim demonstrates a practical solution to resolving designer issues caused by inconsistent event handler modifications across partial classes of the form.
Example Scenario: He explains how deleting an event handler (Form1_Load) in one partial class (Form1.cs) but not in the other (Form1.Designer.cs) can disrupt the designer's ability to load the form properly.
- Uniform Modifications: By ensuring that all modifications are applied consistently across both partial classes, developers can effectively restore functionality to the Windows Forms designer without resorting to drastic measures like restarting Visual Studio or recreating the project.
Handling Other Events in Windows Forms
1. Event Handling Mechanism
Tim explains the event handling mechanism in Windows Forms. When using the Windows Forms designer, Tim notes that double-clicking on a control, like a form itself, generates a default event handler for that control. For instance, double-clicking on the form creates a Load event handler. Tim warns that if developers delete the code inside the handler without removing the event handler itself, it disrupts the form's rendering in the designer. This is because the designer translates the visual layout into code, which is essential for the form to render correctly at runtime.
2. Understanding Form as a Class
Tim elaborates that Windows Forms are essentially classes inherited from Form, which provide functionalities such as form layout, window management (minimize, maximize, close buttons), resizing capabilities, and more. According to Tim, this inheritance allows developers to leverage pre-built UI components (Button, TextBox, Label, etc.) and manipulate them by modifying their properties and methods.
3. Manipulating Properties
In the video at 29:16, Tim Corey demonstrates how properties in Windows Forms, visible in the Properties window of Visual Studio, enable developers to configure visual elements such as labels (Text property), buttons (Text property, Click event), and progress bars (Value property). Tim emphasizes that these properties can be modified both at design time and runtime, influencing how controls behave and appear on the form.
4. Creating Multiple Instances
Tim explains that each form (Form1, Form2, etc.) in Windows Forms is an instance of a class (Form). By creating multiple instances dynamically, developers can manage multiple windows within an application effectively. Tim suggests that this capability facilitates rapid application development (RAD), allowing forms to be quickly designed, customized, and interconnected to build complex user interfaces.
5. Application Startup Configuration
The Main method in Program.cs determines the starting point of the application by specifying which form (Form1, Form2, etc.) to initialize first using Application.Run(new Form1()). Tim underscores that altering this startup form changes the initial view presented to users when they launch the application, influencing the application's flow and user experience.
Menus and Toolbars in Windows Forms
Tim demonstrates the versatility of WinForms by showcasing menus and toolbars. He explains how easy it is to add and customize these elements within the form. Here are the key points Tim covers:
Adding a Status Strip
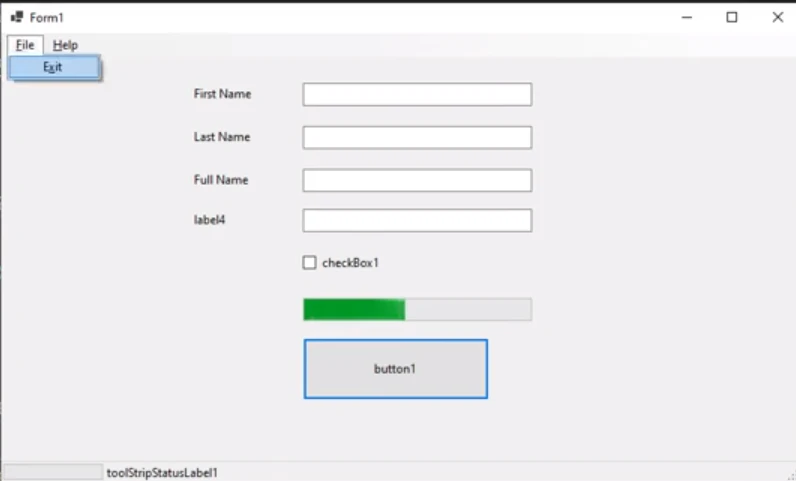
Tim Corey demonstrates how to enhance user interaction by adding a StatusStrip control to a form. This control includes components like a ToolStripProgressBar and ToolStripStatusLabel. By utilizing drag-and-drop functionality in Visual Studio, developers can quickly incorporate these elements to display dynamic information, such as progress updates during tasks or status messages.
Customizing Menu Strips
Corey emphasizes the importance of adhering to Windows standards when designing menu strips (MenuStrip) for Windows Forms applications. He explains how to use the ampersand (&) to designate keyboard shortcuts and underscores (_) for accessibility, ensuring users can navigate through menus using keyboard commands. For instance, assigning &File with &Exit underlined as E allows users to quickly access and execute commands without relying on mouse interactions.
Creating Submenus and Events
Corey illustrates how to create submenus under the MenuStrip and associate events with menu items. By double-clicking on menu items, developers can generate event handlers and implement functionalities such as displaying messages (MessageBox) or executing actions like closing the application (this.Close()). He underscores the importance of adopting proper naming conventions and best practices to maintain code readability and scalability.

Best Practices and Tips by Tim Corey
Tim Corey emphasizes starting a WinForms project on the right foot by renaming the default form (Form1) to a more meaningful name, such as MainForm (1:02:01). This simple step ensures consistency throughout your project, updating references across your codebase seamlessly.
Customizing Form Properties
Next, Tim stresses the importance of customizing form properties early on. Adjusting the Text property of the form itself to reflect its purpose (e.g., "Main Form by Tim Corey") enhances clarity and organization within the Visual Studio environment. Additionally, setting the font size (typically around 14-18 points) and form size (width and height) appropriately ensures readability without distorting the layout of other controls.
Managing Control Properties
Corey highlights the pitfalls of default control properties when changing form-wide settings after controls have been added. Then he adds a label, textbox, and a button to the form and shows that it automatically takes the font size as selected for the form. He demonstrates how modifying the font size affects all controls, urging developers to establish these settings early to avoid unintended layout changes later. If you change the properties value for each control then it doesn't take the default values of the form (1:06:33).
Naming Conventions for Controls
One of the key takeaways from Tim's video is the use of meaningful naming conventions for controls. Instead of the traditional "lblFirstName" or "txtFirstName," Corey advocates using camelCase for variables (firstNameLabel, firstNameTextBox) and postfix the control name at the end.
Event Handling and Naming Conventions
A notable practice Tim advocates is naming controls and handling events consistently. By naming controls (sayHelloButton, firstNameTextBox) intuitively from the outset, developers streamline event handling. This approach prevents confusion when handling multiple events across forms and reinforces maintainability.
He demonstrates this by showing the difference between naming the buttons appropriately as opposed to leaving them as default like button1, button2, etc. This approach aligns with modern coding practices, allowing quick searching and improving readability, making it easier to understand the purpose of each control at a glance.
Implementing Tab Order and Accessibility
Another crucial aspect covered is setting the tab order for controls. Tim explains how to use the TabIndex property to ensure users can navigate through the form logically using the Tab key. This not only enhances user experience but also improves accessibility for users who rely on keyboard navigation.
Passing Data Between Forms
Expanding on WinForms’ capabilities, Tim talks about passing data between multiple forms. He demonstrates how to define constructors in forms to facilitate data exchange. This technique allows developers to initialize new forms with specific data, enhancing flexibility in application design.
Conclusion
Tim Corey’s tutorial on Windows Forms in .NET 6 is a valuable resource for anyone looking to learn desktop application development using C#. The video covers a broad range of topics from basic setup to advanced controls and best practices, providing a solid foundation for creating professional Windows Forms C# applications.
For a detailed walkthrough with more context and additional hands-on coding examples, you can watch Tim Corey’s full tutorial video here.


